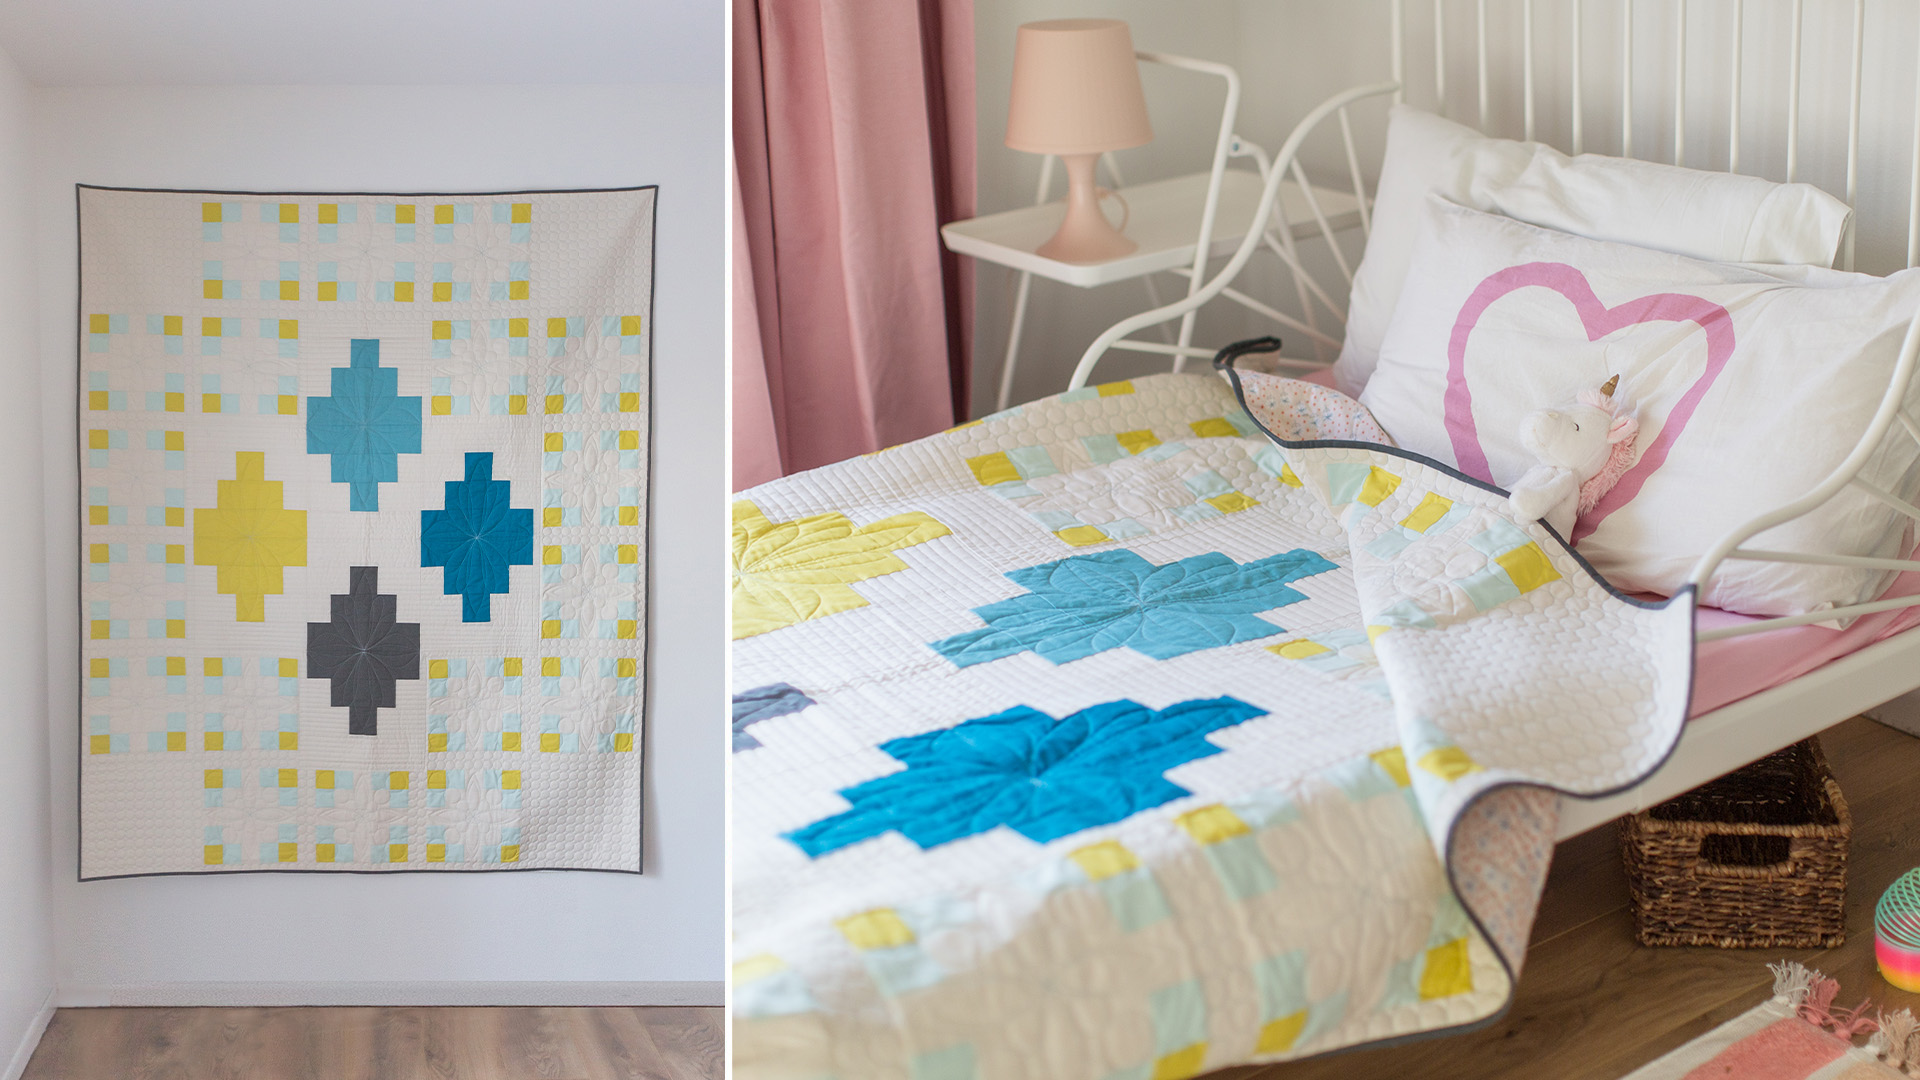
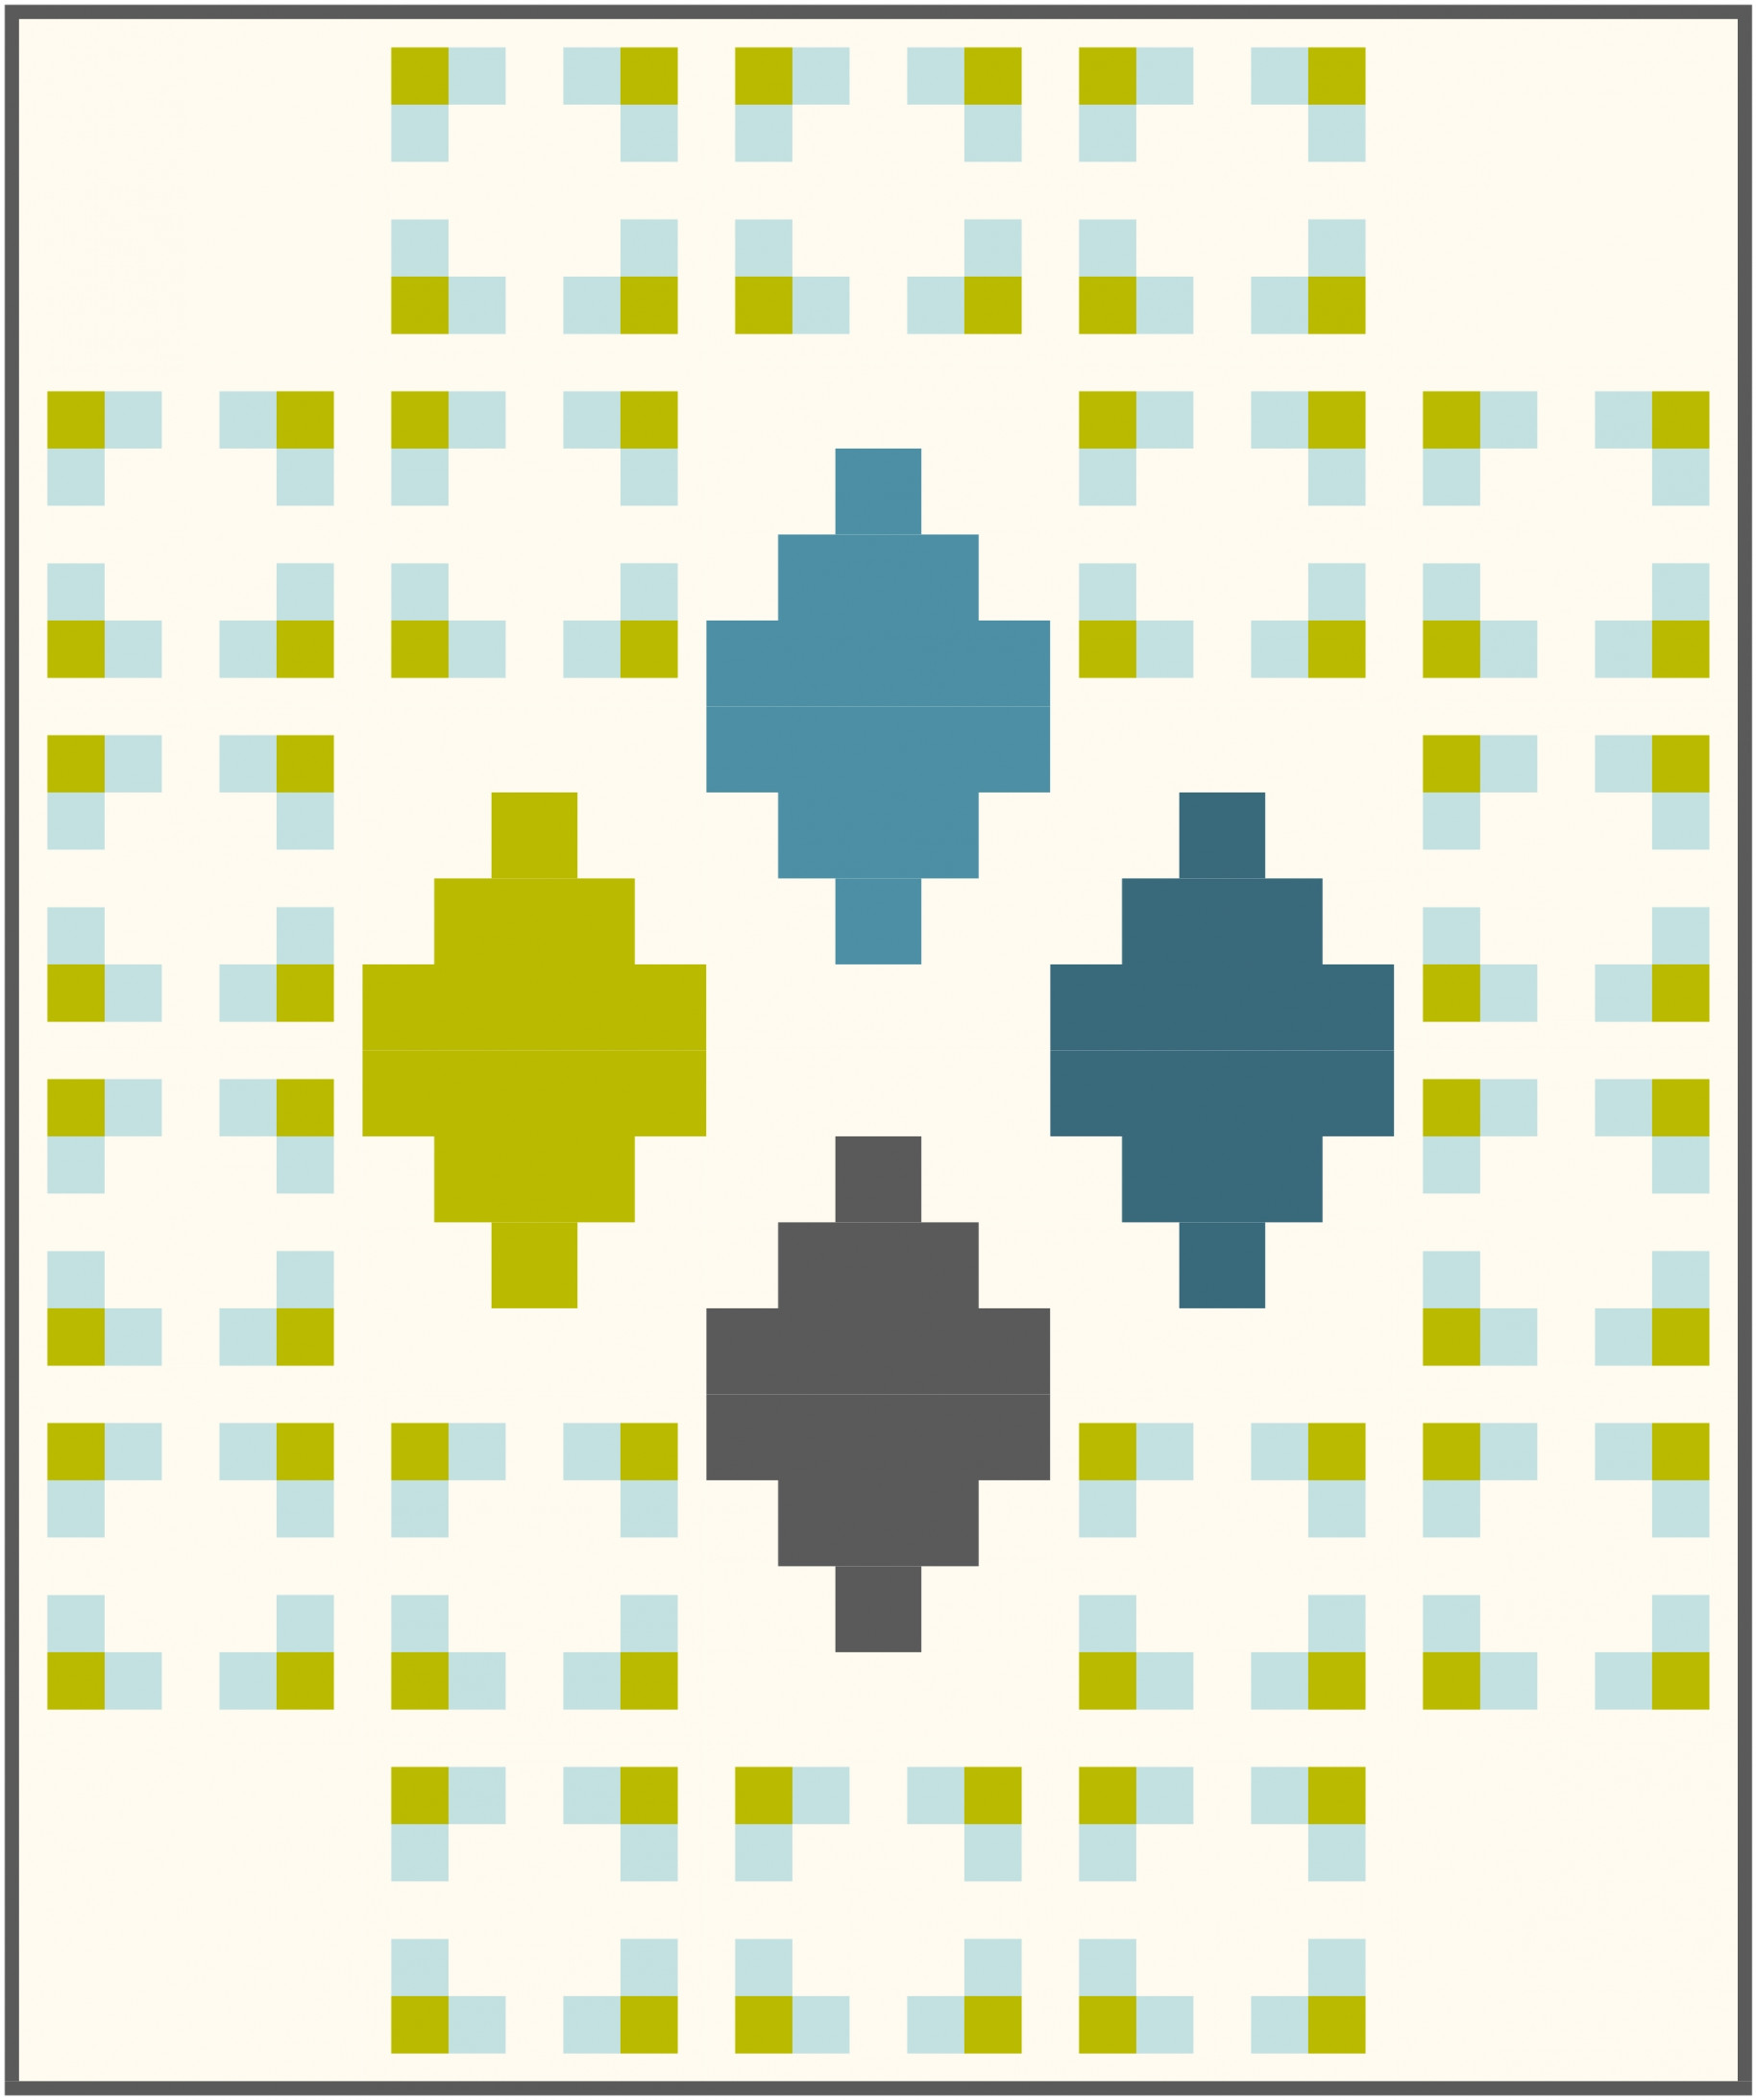
This beautiful modern quilt pattern was designed by Amy Ellis of Amy's Creative Side and Sew Modern Quilts. She designed Tilework with open spaces to highlight with quilting. The Baby Lock Regalia has so many custom quilting possibilities and it's fun to explore them while completing this quilt! Click here to download printable instructions.
Quilt Dimensions:
- 18 A Blocks
- 8 B Blocks
- 4 empty block spaces
- 60” x 72” finished quilt size
- 12 1/2” x 12 1/2” unfinished block size
Materials:
- 3 yards of background fabric
- 3/4 yard of light blue fabric
- 2/3 yard of green fabric
- 3/4 yard of charcoal fabric (includes binding)
- 1/4 yard of medium teal
- 1/4 yard of deep teal
- Basic quilting supplies
Tools:
Steps:
-
Cutting Instructions - from the background fabric cut:
-
3 strips 12 1/2” x WOF crosscut into;
4 squares 12 1/2” x 12 1/2” 36 rectangles 1 1/2” x 12 1/2”
-
2 strips 10 1/2” x WOF crosscut into;
36 rectangles 1 1/2” x 10 1/2”
-
3 strips 6 1/2” x WOF crosscut into;
18 squares 6 1/2” x 6 1/2”
-
6 strips 3 1/2” x WOF crosscut into;
8 rectangles 3 1/2” x 12 1/2” 16 rectangles 3 1/2” x 5” 16 rectangles 3” x 3 1/2”
-
5 strips 2 1/2” x WOF for strip piecing
-
-
From the green fabric cut:
-
2 strips 3 1/2” x WOF crosscut into;
2 rectangles 3 1/2” x 12 1/2” 2 rectangles 3 1/2” x 7 1/2” 2 squares 3 1/2” x 3 1/2”
-
5 strips 2 1/2” x WOF for strip piecing
-
-
From the light blue fabric cut:
-
10 strips 2 1/2” x WOF for strip piecing
-
-
From the charcoal fabric cut:
-
2 strips 3 1/2” x WOF crosscut into;
2 rectangles 3 1/2” x 12 1/2” 2 rectangles 3 1/2” x 7 1/2” 2 squares 3 1/2” x 3 1/2”
-
7 strips 2 1/4” x WOF for binding
-
-
From both the medium teal and deep teal fabric cut:
-
2 strips 3 1/2” x WOF crosscut into;
2 rectangles 3 1/2” x 12 1/2” 2 rectangles 3 1/2” x 7 1/2” 2 squares 3 1/2” x 3 1/2”
-
-
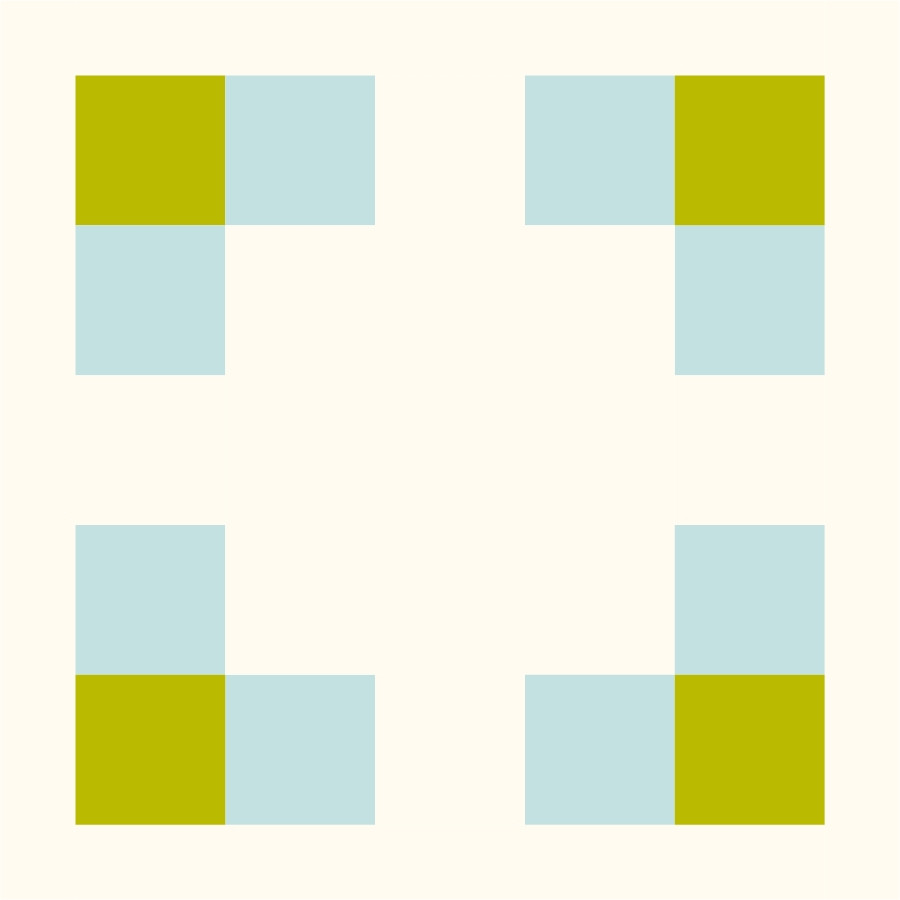
Block A Construction:
-
Sew 5 strip set units as shown with a 2 1/2” background strip and two 2 1/2” light blue strips. Press the seam allowances toward the darker fabric with each addition.
-
Cut one strip set in half 20” - 22” to continue strip piecing. Cut one of the green 2 1/2” strips in half also.
-
Working with two strip sets and half from step 2 add 2 1/2” green strips to the long edge as shown. Press the seam allowances away from the center with each addition.
-
From both the background/light blue strip sets and the background/light blue/green strip sets cut 36 segments 2 1/2”-wide.
-
Pin and sew the background/light blue segments to opposite sides of the 6 1/2” background squares. Press the seam allowances toward the center. Make 18.
-
Nest seams and pin and sew the background/light blue/green segments to the remaining sides of the 6 1/2” background squares. Press the seam allowances toward the center.
-
Pin and sew the 1 1/2” x 10 1/2” background rectangles to the opposite sides of the block unit. Press the seam allowances away from the center.
-
Pin and sew the 1 1/2” x 12 1/2” background rectangles to the remaining sides of the block unit. Press the seam allowances away from the center.
-
-
Block B Construction:

-
Sew the 3 1/2” squares between two 3 1/2” x 5” background rectangles. Press the seam allowances toward the darker fabric.
-
Sew the 3 1/2” x 7 1/2” rectangles between two 3 1/2” x 3” background rectangles. Press the seam allowances toward the darker fabric.
-
Layout the block units sewn in step 1 and 2 with the 3 1/2” x 12 1/2” rectangles.
Pin and sew the block units together. Press in one direction per block half up and half down so they nest later when sewing the quilt top together.
-
-
Quilt Top Assembly:
-
Lay out the blocks and 12 1/2” background squares in six rows of five blocks as shown. Turn the blocks so that the seams do not create bulk in the quilt top.
-
Pin and sew the rows together to complete the quilt top. Press the seam allowances in one direction.
-
-
Finishing:
-
Layer your backing batting and quilt top to make a quilt sandwich.
-
Baste the layers together and quilt using your favorite quilting method.
-
Trim the backing and batting to match the quilt top.
-
Bind your quilt and enjoy!
-


