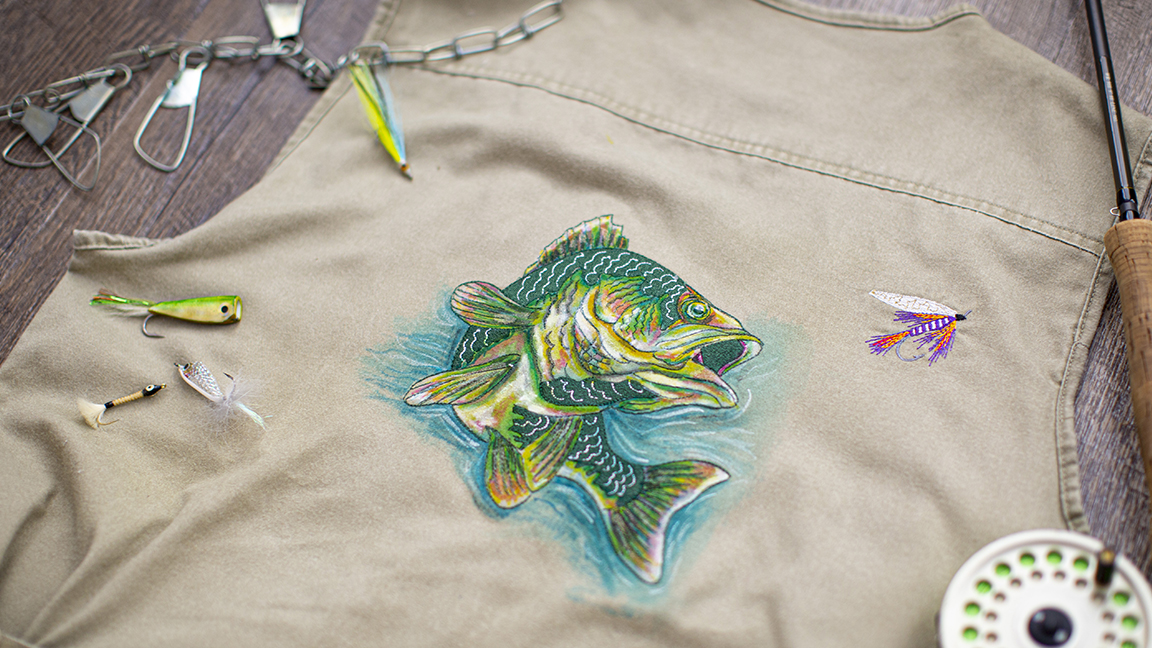
It is time to bait those hooks cast those lines and catch a fish or two. This project will give the sportsman in your life a great-looking embroidered and embellished vest.
Materials:
- Fisherman’s Vest purchased from your favorite outdoor store
- Bass embroidery design
- Medium tear-away stabilizer
- Black 40 weight polyester embroidery thread
- Black bobbin thread
- Fishing fly design sized to 1.5"
- Polyester threads you've selected for the fly design.
- Fabric Markers (I used DIME Fiber Markers. I looked up photos of a bass to help me decide on my colors)
- Tsukineko All-Purpose Ink (champagne mist and white)
- Print and stick target paper by DIME was used for creating templates (paper and tape work well too).
Tools:
Steps:
-
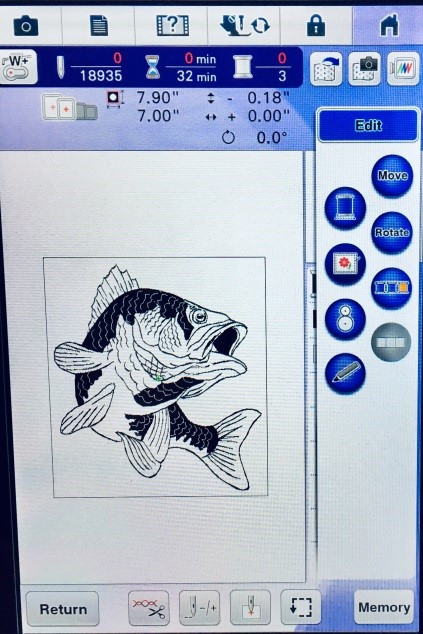
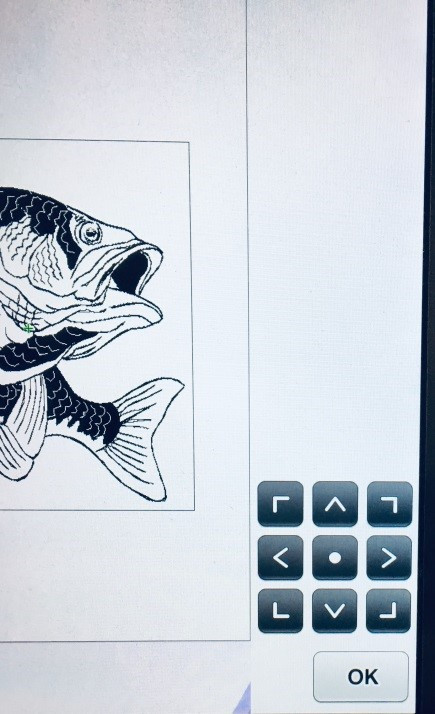
Resize the Bass fish 7.90" x 7" inch using the resizing tool that will change the stitch count and density.
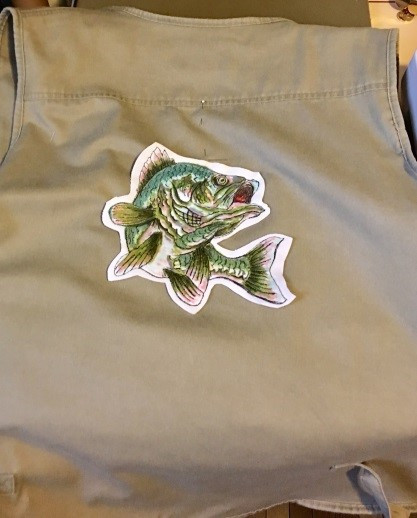
Cut the sample out and use it as a template to help place it to preview where you might like to stitch the bass on the vest also create a template of the fishing fly to get your layout figured out.
-
Cut the sample out and use it as a template to help place it to preview where you might like to stitch the bass on the vest.
-
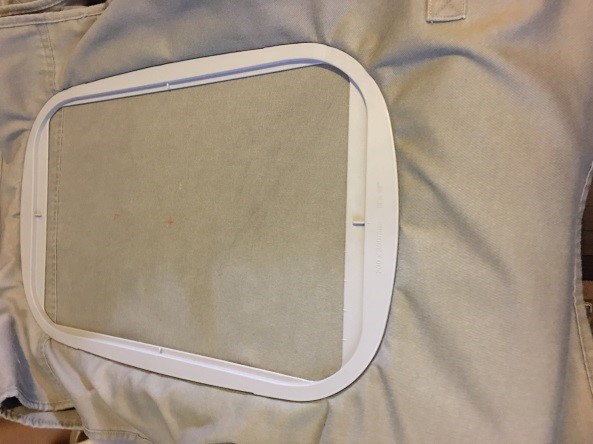
Once you are happy with placement hoop the vest with a medium tear away stabilizer.
Float another piece underneath the hoop to keep your Bass and vest from puckering. Attach to the embroidery arm.
-
Use the move keys to move the needle to line up with the crosshairs on your template or the start point on the practice stitch out.
Rotate the needle through the crosshairs to ensure that you are in the center rotate needle out of fabric and remove template. You are now ready stitch out your Bass and then stitch your fishing fly.
-
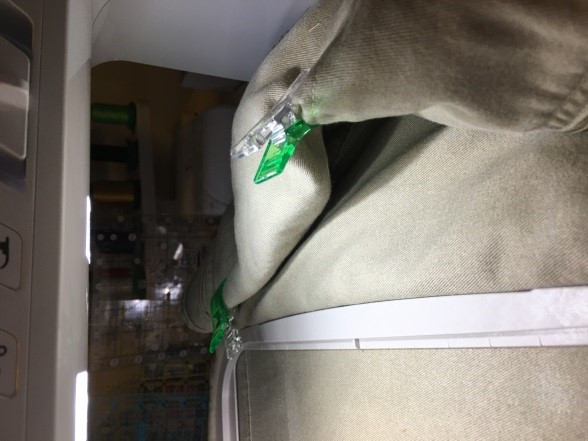
I used Clover Clips to help control the excess vest area.
-
Create a layout that is pleasing to you. This design was done in an 8" x 12" inch hoop.
-
Now let the creativity get started it is time to bring your Bass to life however you like. This is where you will use your Fabric Fiber Markers there are many on the market.
-
I started with the lightest colors first and then layered it to intensify the color.
My last steps I added a little diluted Champagne Tsukineko All Purpose-Ink Champagne Mist brushed lightly on areas of the Bass to give the fish and the water areas to glistening sparkle. I came back with the White Tsukineko All Purpose Ink to add some highlights.
-
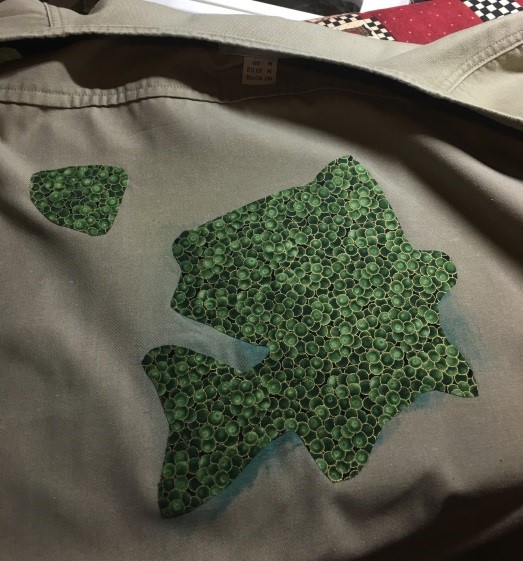
Create a patch of fabric in the shape of your Bass and fishing fly just a little larger using Wonder Under Lite and a cotton fabric of your choosing.
Iron this on to the wrong side of the jacket to cover the stitched area. This will give the interior of the vest a much more finished appearance.