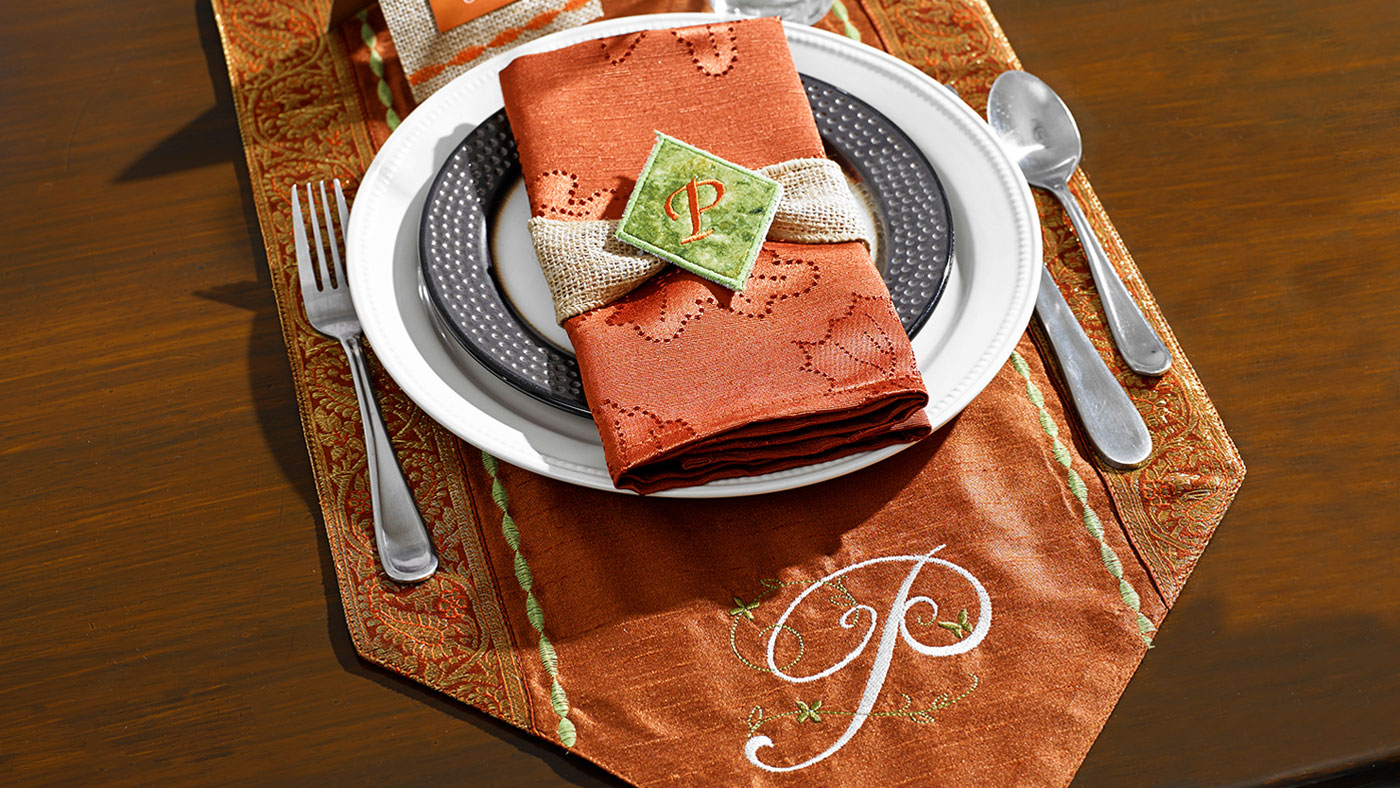
Create a beautiful Thanksgiving table setting with an embroidered runner and napkins that your family and friends will love. Use the Baby Lock Verve Sewing and Embroidery machine to create this festive fall home decor ensemble. Download printable instructions.
Materials:
- 1 Purchased table runner in a solid color orange
- Napkins
- 1 Roll of burlap 2” wide
- 1 Scrap of green print fabric for appliqué
- 1 Pack of Burlap Paper purchased from Hobby Lobby (6” x 6”)
- Madeira® Matt embroidery thread (green and orange)
- Baby Lock Stick-Tear Tear-Away stabilizer
- Baby Lock Cut-Away Fusible Applique Stabilizer
- Baby Lock Interfacing Stabilizer for napkin rings
- Frixion Pen
Tools:
Steps:
-
To create the place cards:
-
Set up the machine for sewing.
-
Place the Open Toe foot on the machine.
-
Select the decorative stitch 7-06 under Satin Stitches.
-
Adjust the width to 7mm.
-
Adjust the length to 3mm.
-
Fold the Burlap Paper 6” square in half and crease.
-
Using the Frixion Pen draw a straight line across the width of the Burlap paper ½” away from one of the bottom edges.
-
Draw another line ½” downward from the folded line.
-
Thread the machine with the Madeira Matt thread. In the sample Orange thread was used.
-
Place the edge of the foot even with the drawn line and sew. Go at a slow even pace.
-
Print out a name for each of the place cards.
-
Glue the name to the center of the place cards.
-
Repeat for the other place cards.
-
Lightly press the place card to remove the drawn lines.
-
-
To create the table runner follow the next set of steps:
-
Sew the same decorative stitch around the outer edge of the table runner by placing the outer edge of the foot even with the outer edge of the runner. Draw a line using the Frixion Pen.
-
Set the machine up for embroidery.
-
Thread the machine.
-
Hoop the Baby Lock Stick-Tear Tear-Away stabilizer with the shiny side up.
-
Score the edge of the stabilizer and tear the top layer away to expose the sticky side.
-
Determine the placement of the letter on the ends and place a cross mark.
-
Place the cross-mark on the table runner centered in the hoop.
-
Finger press to secure.
-
Select the floral font from the font folder and place the letter of your choice on the workspace.
-
Move the needle so it is lined up over the cross-mark on the runner.
-
Embroider the design using Madeira thread.
-
-
To create the napkin rings follow the next set of directions:
-
Go to the Frames field and select the Diamond frame with the single run stitch.
-
Then select the same frame with the satin stitch.
-
Resize the frames to approximately 2 ½” across and 3” tall.
-
Select a small letter for the monogram.
-
Hoop the Stick-Tear Tear-Away Stabilizer and remove the paper from the stabilizer.
-
Using the interfacing stabilizer cut a section that measures 3 ½” x 3 ½”.
-
Place the stabilizer in the hoop and finger press to secure.
-
Embroider the first color in the design.
-
Fuse the Baby Lock Cut-Away Fusible Applique Stabilizer to the back side of the green print fabric.
-
Peel away the backing.
-
Place a small section of the green print fabric over the stitched outline in the hoop.
-
Continue with the embroidery.
-
Repeat for the remaining napkin rings.
-
Cut out the sections close to the stabilizer.
-
Attach the monogrammed sections to the 2” wide burlap and tie to the napkin.
-


