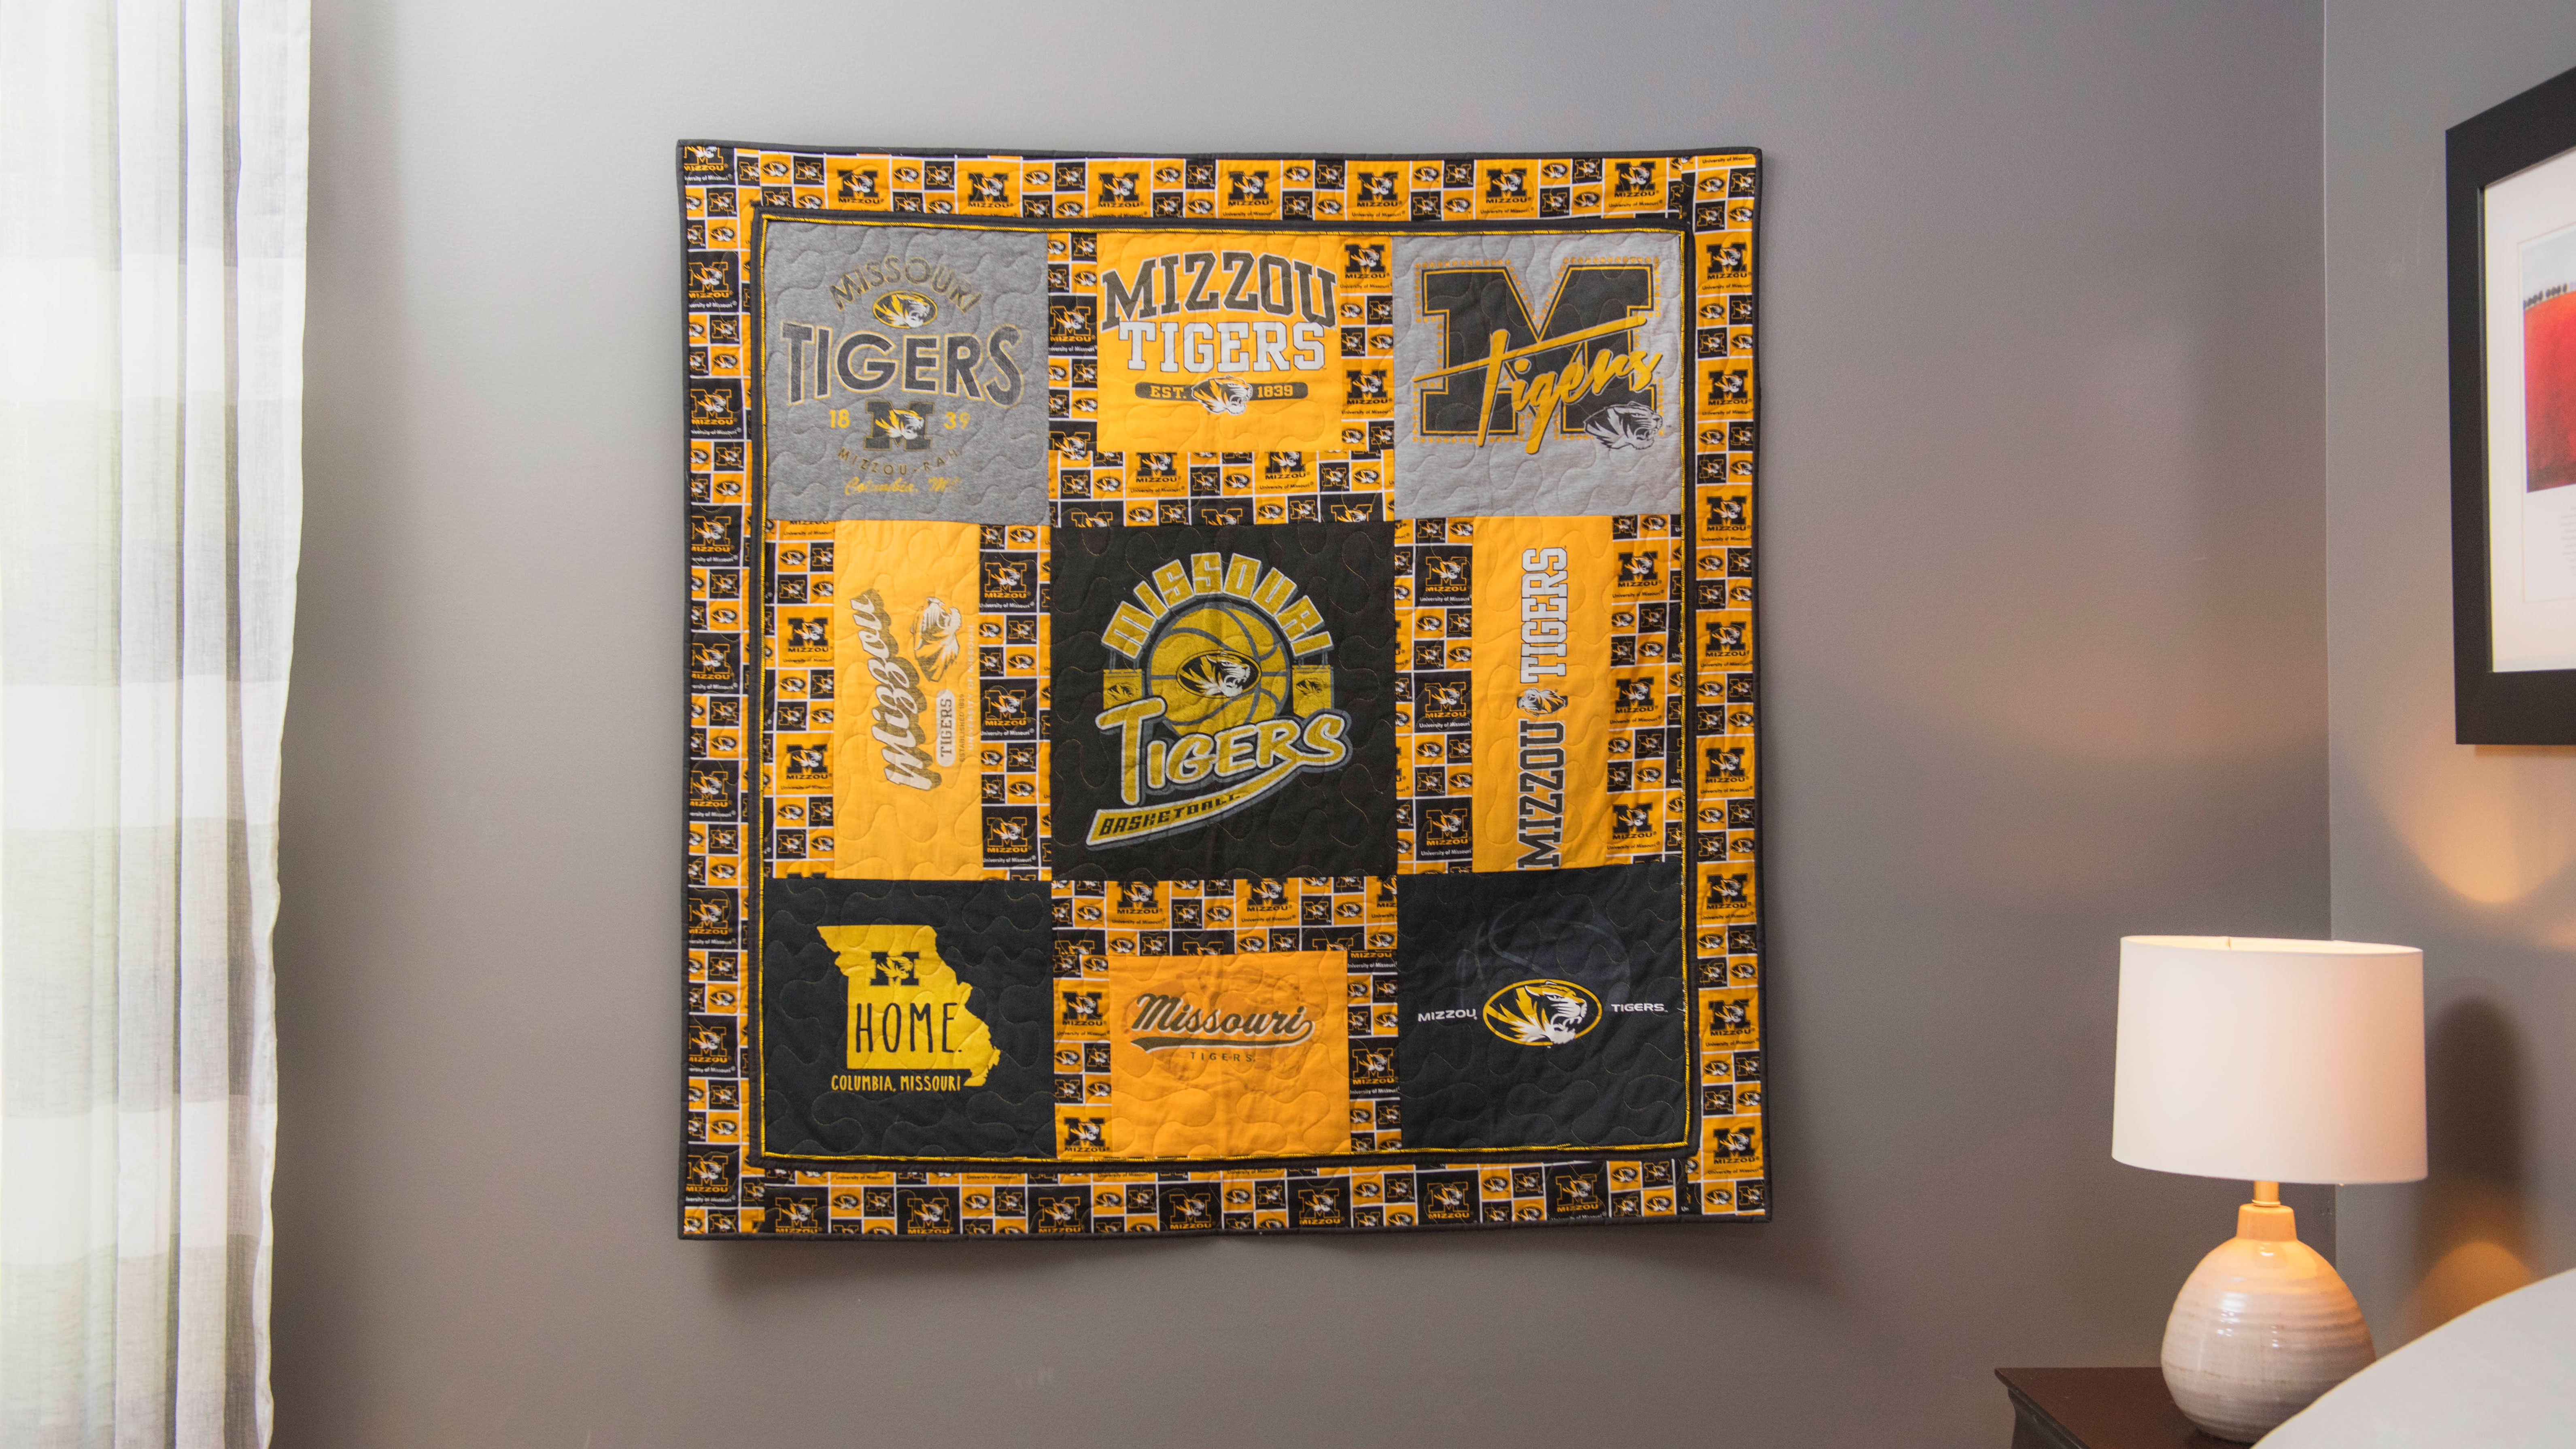
Everyone has more t-shirts than they know what to do with. Create a quilt to wrap yourself up in your memories or give to a high school or college student as a gift. Use your Baby Lock serger's exclusive wave stitch to create a unique finished edge! Download printable instructions.
Materials:
- 9-10 T-shirts
- 2 Yards of cotton print fabric for the sashing
- ½ Yard of contrasting solid fabric for serger wave trim
- Pellon Fusible Knit stabilizer (EK130)
- Madeira® serging thread to match the fabric (black)
- 2 Spools of Wonderfil Razzle (black and gold) to coordinate with fabrics
- Scissors
- Pressing cloth (optional)
- Basic sewing supplies
Tools:
- Baby Lock Triumph Serger
- Baby Lock Crown Jewel III
- Baby Lock Sewing machine (Optional)
Steps:
-
Wash all of the t-shirts.
-
Cut away the arms and around the neck on each of the shirts and down each of the sides.
-
If you have any unusual placement of a design cut out the design leaving as much space around the design as possible.
-
In the sample there was a design on one of the long sleeves. Unusual sizes will give a more unique look to your quilt.
-
-
Fuse the Pellon Fusible Stabilizer to the back side on each of the cut out t-shirt sections.
-
This fusible stabilizer will hold the shape on the t-shirt fabric and will make it easier to serge and quilt.
-
Be careful when you are fusing the sections that you do not melt the logo designs.
-
Optional: a pressing sheet works well when fusing and will keep the iron clean while protecting the design on the front on each section.
-
-
In this sample the sections were cut into 14” squares.
-
The long sleeve section was cut down to 14” x 5”. If possible cut another section down to the same size.
-
Place the sections on a flat surface and determine the placement on each of the squares. Move them around until you settle on a workable layout.
-
The block size will depend on the size of the shirts. You might have to be flexible with the block sizes.
-
-
From the cotton sashing fabric cut out 4” wide strips across the width of the fabric. Cut the length as you piece the blocks together.
-
Set up the Serger for a 3-Thread Overlock-Narrow stitch.
-
Place the needle in the 02 slot.
-
Width 3.0.
-
Length at 2.5.
-
Stitch Selector on B.
-
Wave selector on Overlock.
-
Blade position up.
-
-
With right sides together place a sashing strip to the right side of the first square block.
-
Serge the seams together while cutting only a small sliver away with the blade on the serger. Press all seams in the same direction.
-
-
Sew the next t-shirt block to the opposite side of the sashing. Then sew the next sashing strip to the block. Continue until the first row has been sewn together.
-
Sew the next two rows together in the same manner.
-
Sew the sashing strips to the bottom of the first row. If your strip is not long enough piece the strips together.
-
Sew the second row to the first and then sew the last row to the quilt.
-
Square up the pieced quilt top.
-
Cut several 1 ½” wide strips from the solid fabric (black) and piece them together.
-
Fold the strip in half lengthwise and press.
-
Set up the Serger for a 3-Thread Wave Stitch.
-
Place the needle in 02.
-
Set the Length to 1.0.
-
Set the Width to 5.0.
-
Set the Wave Selector to Wave.
-
Blade Position should be up.
-
Thread the machine with the Wonderfil thread in the upper and lower loopers. I placed the brighter of the two threads (Gold) in the upper looper.
-
Use a black Madeira Serger thread in the needle.
-
-
Do a test sew for accuracy. If any adjustments to the serger are needed make them at this time.
-
Serge the raw edge of the strip with the 3-Thread Wave Stitch to create the wave trim.
-
Place the unstitched edge of the trim along the outer edge on the pieced quilt. Baste the trim to the edge. (I used a regular sewing machine for this.)
-
Serge a sashing strip to the top & bottom then serge the sashing strips to the sides on the pieced quilt.
-
Use the Crown Jewell III for quilting the layers together as desired.
-
Bind the quilt to finish.


