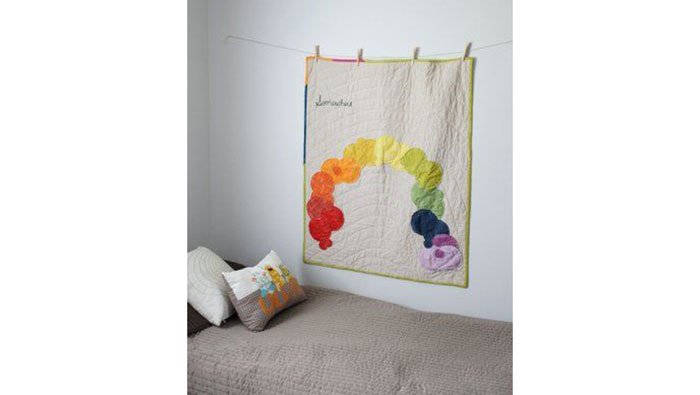
This simple wall hanging will brighten any room. Pair its modern design with the traditional look of hand stitching using the Baby Lock Sashiko machine. You can even personalize the rainbow using different fabrics or try new color combinations for a unique look. Download printable instructions.
Materials:
- Madeira Aerofil all-purpose thread preferably a neutral color to blend with your background fabric of choice
- 1 Yard of cotton linen fabric for background
- 1 Yard of cotton fabric for back of quilt
- 44" x 36" Batting
- 1/2 yard of cotton fabric for binding
- Fabric remnants 4" wide and larger for the rainbow in a variety of colors (red orange yellow green blue indigo violet)
- Olfa circle rotary cutter
- Fabric chalk
- Optional: Hand-embroidery needle black embroidery floss
Tools:
- Baby Lock Sashiko Machine
Steps:
-
Cutting: Cut your background fabric to 40" x 34".
-
For the rainbow circles you will be making two different sizes: 3" and 2".
-
Cut a couple of 3" circles from each color you have collected and one 2" circle from the same color. You should end up with around 32-35 circles.
-
-
Cut the back of your quilt to be 44" x 36" (or as close as you can get to 36").
-
Cut the batting to 44" x 36".
-
Cut the binding into 2.5" strips.
-
Assembly: Iron your background fabric. You don't want to have any wrinkles in the background.
-
Optional: Hand stitch "somewhere" on the top left hand side of the background fabric. Measure 7" down from the top and then 2.5" from the left side. Use 5-6 embroidery floss threads.
-
Lay out your circles first to make sure you have enough and so you can decide on your placement. Measure 27" up from the bottom of the background fabric and place your first circle at that po
-
From the first circle alternate circles to overlap and underlap each other. You will be making a rainbow shape. There is no right or wrong here. Just make sure the colors are in the right or
-
Mark your circle locations with chalk or take a picture for reference.
-
Take all the circles off and start again on the 27" mark with the center circle. You will top stitch 1/4" from the edge of each circle.
-
This will give you a raw edge that will look adorably worn after being washed and dried. Remember to overlap and underlap as you go to give it varying depths.
-
Settings should be: Stitch Length - 4 Stitch Space - 3.
-
-
You can also sew your binding strips together at this point. Short edge to short edge right sides together. Sew all strips together to make one long strip.
-
With all your circles stitched on it is now time to baste the quilt. You need to get your quilt ready before you actually quilt it.
-
Make a sandwich with the back of your quilt facing right side down the batting in the middle and the top of your quilt facing up.
-
Pin really well with safety pins so it doesn't move when you go to quilt it.
-
-
Using tailor's chalk or a marking tool sketch out your quilt pattern.
-
Follow the shape of the rainbow by measuring 1" from the rainbow and continued to space my marks by 1" increments both above and below the rainbow.
-
-
Once your marks are made it's time to quilt!
-
Use the same settings that you used for your circles. Stitch Length - 4 and Stitch Space - 3. Remove the pins from your quilt.
-
-
Lightly press and trim to square up your quilt.
-
To add the binding fold the binding in half lengthwise wrong sides together. Align the raw edges of the binding on the BACK of the quilt. Stitch it in place.
-
Fold the binding to the front of the quilt and stitch in place. That way you can admire your Sashiko "hand" stitch on the front of the quilt.
-
-
Display for all to see and admire your new masterpiece.


