
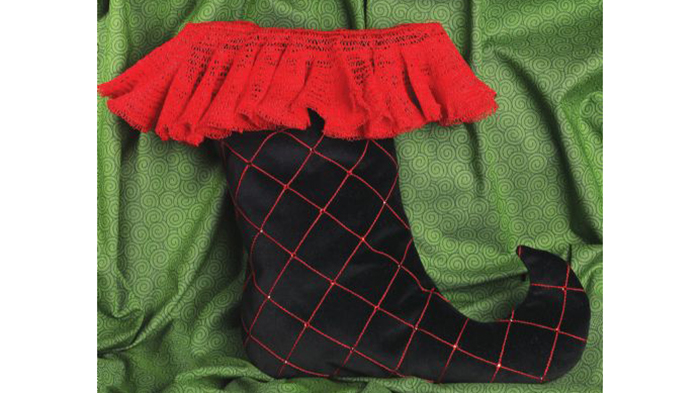
A simple stocking pattern can be taken from ordinary to extraordinary with a Baby Lock serger! By using a 4-thread overlock decorative thread in the looper position and stacking row on top of row of stitching it is possible to create serger lace. A chain stitch and decorative thread can be used to create a grid pattern to make this Christmas project elegant. Combine these two techniques and add some crystals and a stunning stocking to hang on your holiday mantle is the end result. Download printable instructions.
Materials:
- Fabric Guide
- Clear foot
- Two 18” x 18” stocking fabric
- Two 18” x 18” lining fabric
- 2 Spools 12wt cotton thread
- 1 Spool serger thread
- Size 80 serger needles
- Hot fix crystals and crystal setting tool
- Chalk marker
- Gridded cutting mat
- Ruler
- Scissors
- Iron
Tools:
- Baby Lock Triumph Ovation Evolution Serger
Steps:
-
Print and enlarge stocking template according to measurements.
-
Place the stocking front on a gridded cutting mat wrong side up. Square one corner and side with the mat.
-
From the corner measure over 2” and mark this point. From the same corner measure down 2” and mark this point. Connect these two points.
-
From this marking measure down 2” and mark a line. Repeat across the stocking front.
-
-
Repeat the above set using the other corner and side.
-
Set the serger for a chain stitch placing the 12wt thread in the chain looper and the serger thread in the needle.
-
The machine settings are as follows: C3 needle stitch length 2.5 chain needle tension at 4 chain looper tension set at the narrow side of the chain stitch setting.
-
-
Align the marks on the wrong side of the fabric with the raised notch needle position indicators on the presser foot. Stitch each line.
-
Cut out the stocking front back and both lining pieces using the pattern.
-
Attach the fabric guide to the sewing table on the serger. The fabric guide will be the seam allowance guide.
-
Place the lining pieces right sides together and stitch around the stocking. Place the stocking front and back pieces right sides together and stitch around the stocking.
-
Press the seams on both sides to set and then press the seam allowance open. Trim the seam allowance to 1/8” around the heel and toe of the stocking. Do this for both the stocking and lining
-
Turn the stocking right side out. Place the lining inside the stocking wrong sides together and match the fabric edges.
-
Change the serger over to a wide overlock stitch using the following settings: O1 needle stitch length 3 stitch width 7.5 stitch selector A differential feed N cutting blade locked.
-
Attach the clear foot.
-
-
Place the 12wt thread in both the upper and lower looper and serger thread in the needle.
-
Stitch around the stocking and lining joining them together. This is also the first row in the serger crochet lace.
-
Add rows by placing the first mark on the presser foot on the edge of the last row stitched. Continue to stitch adding rows until the desired look is achieved.
-
Add crystals to the stocking front using the crystal applicator wand.


