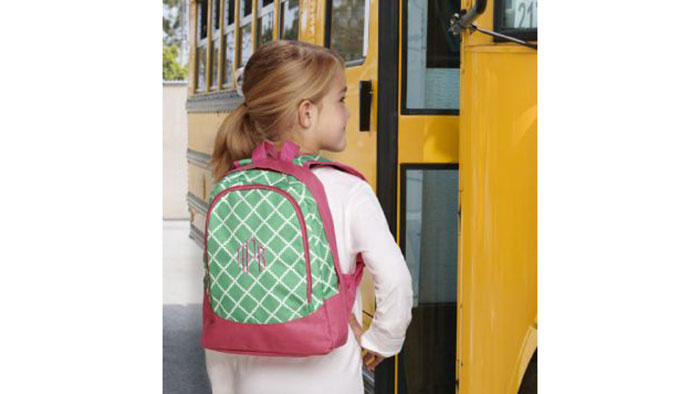
Everything about the new school year is exciting: from the different teachers and classmates to new school supplies. Add to the back-to-school buzz with this personalized monogrammed backpack. This project can also be modified for camping or hiking enthusiasts by changing the words embroidered on the straps. Download printable instructions.
Materials:
- Purchased backpack
- Madeira® embroidery thread
- Tear-Away Soft stabilizer from Baby Lock
- Temporary spray adhesive
Tools:
- Baby Lock® Embroidery Machine
Steps:
-
Hoop the stabilizer in the 5” x 7” hoop. Spray the hooped stabilizer with the temporary spray adhesive.
-
Place a Positioning Sticker on the center of the back section. Unzip the section.
-
Place the flap in the center of the hooped stabilizer and place the hoop on the machine.
-
To create the monogram click on the Monogram icon on the machine.
-
Select the first letter. Click on the center lettering and select the middle initial.
-
Click on the lettering for the third letter and select the third initial. The three letters should all be large.
-
-
Set the machine up to use the Needle Beam in the Properties field.
-
Move the monogram design so that the Needle Beam shines over the center mark on the Positioning Sticker.
-
Embroider the design.
-
To embroider the two straps determine the center and place a Positioning Sticker on each of the straps.
-
Click on the Lettering icon on the workspace. Select the second font on the top row on the second page.
-
Place each of the letters from the word “School” individually and rotate the letters to the left 90˚.
-
Reposition each of the letters so that they are vertical on the workspace (up and down) with accurate spacing.
-
Use the Needle Beam again for accurate embroidery placement for each of the words.
-
-
Embroider the first word and then move on to the second word “Days” while repeating the same steps.


