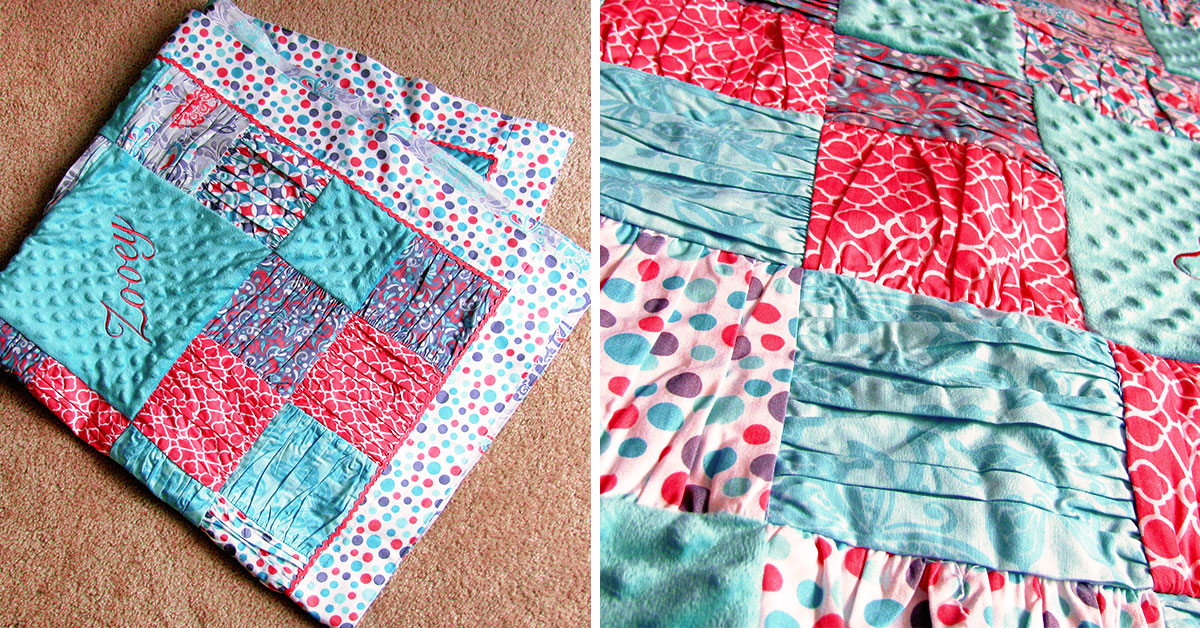
Are you looking for an idea for a handmade gift for a baby shower? Create this adorable ruffled baby blanket using your sewing machine with ruffling foot and serger. You can even add embroidery applique or a pre-made patch to give it an even more personalized touch. Click here to download printable instructions.
Materials:
- 75/11 or 80/12 Universal Sewing Machine Needle
- Madeira Aerofil Polyester Sewing Thread
- 4 spools Madeira Aerolock Serger Thread
- Six Coordinating ½ yd. cuts of 44” Cotton Woven Fabrics* for ruffled blocks
- 1.75 yd. of 57-60” coordinating minky dots fabric for fourteen 6” blocks one 12” block and backing
- ½ yd. of 44” Cotton Woven Fabric* for Front Sashing
- ½ yd. of 44” Cotton Woven Fabric* for Back Sashing
- Wonder Clips highly recommended for securing fabric when serging
- Iron
- Optional: 5 yds. of ¼” Rick Rack
- *Pre-washing cotton fabrics recommended because of sewing to a fabric that doesn’t shrink
Tools:
- Baby Lock Sewing Machine
- Baby Lock Serger
- Baby Lock Ruffling Foot for Sewing Machine (SA122)
- Teflon Foot for Serger recommended
- Optional: Baby Lock Embroidery Machine**
Steps:
-
Cutting:
-
Six – 6” x 12” Cotton Woven Fabric A D E F (6 from each fabric)
-
Seven – 6” x 12” of Cotton Woven Fabric B C (7 from each fabric)
-
Fourteen – 6” x 6” squares of minky
-
One – 12” square of minky
*Optional - can be embroidered prior to or after stitching within the quilt top. Use a medium-weight cutaway stabilizer on the back and a water-soluble topping for best results. No embroidery machine? Consider embellishing the 12” square with applique or a soft pre-made patch!
-
Four - 3” sashing strips cut from selvage to fold for the front and four for the back
-
-
Machine Setup:
-
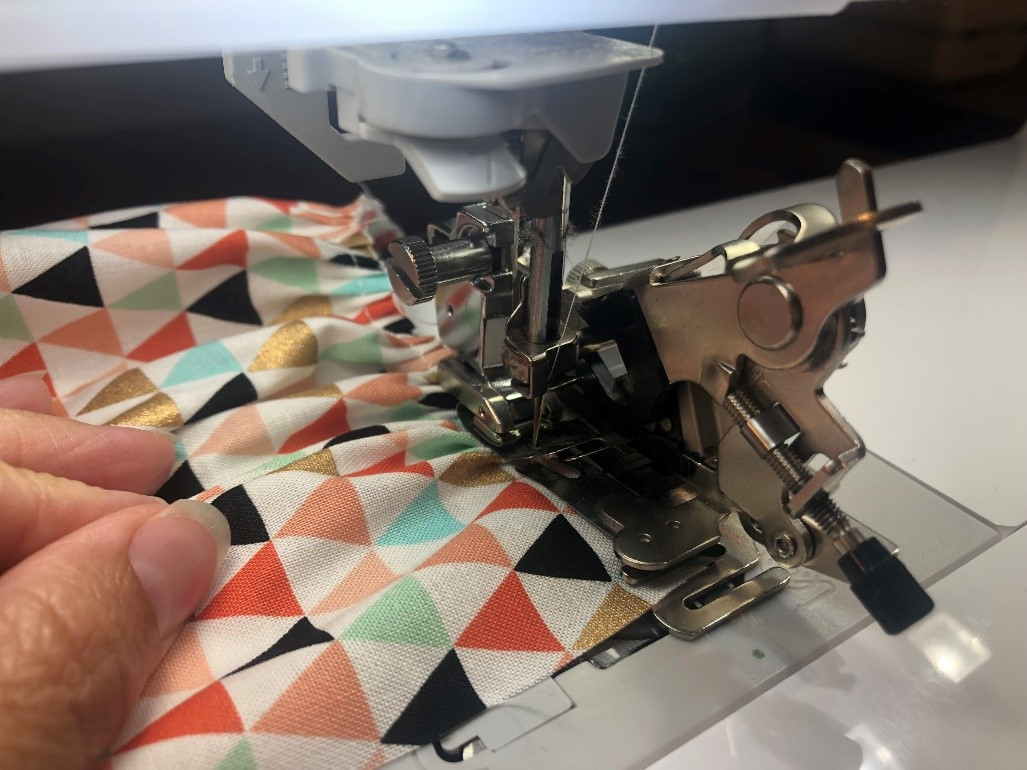
Set Sewing Machine up with sewing thread/bobbin with a CENTER needle straight stitch. Use a 75/11 or 80/12 machine needle.
For starters place the Ruffling Foot on your sewing machine (CENTER needle position is very important when using this foot)! Set the foot to gather per every 1 stitch and the depth of the gathers positioned at the 1 mark (this may be easier to set when the foot is off the machine). Set the stitch length on your machine to 3.0mm.
-
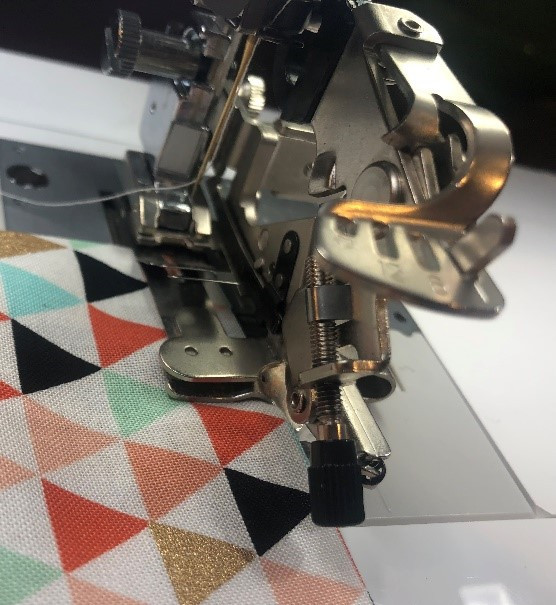
Set Serger up with serger thread for a standard 4-thread Overlock wide. Place the Teflon Serger foot on the machine if you have one.
Set your stitch length to 2.5 and stitch width to 7.5. Differential Feed should be at N.
-
-
Instructions:
-
Using the Ruffling Foot gather along the long edges of all 38 of the 13” strips along both long edges.
Line the fabric up within the guide of the foot according to the attachment instructions.
-
Gently and evenly press the gathers with a hot steam iron.
-
Carefully square up and cut down each of the gathered strips to make them 6” x 6”.
-
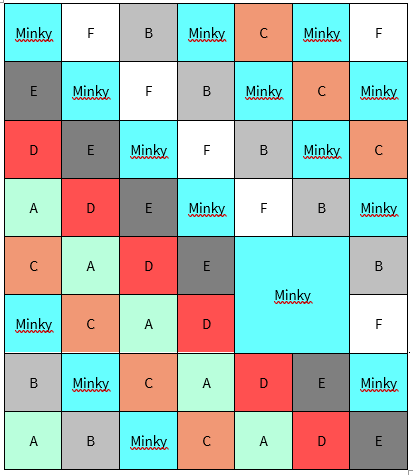
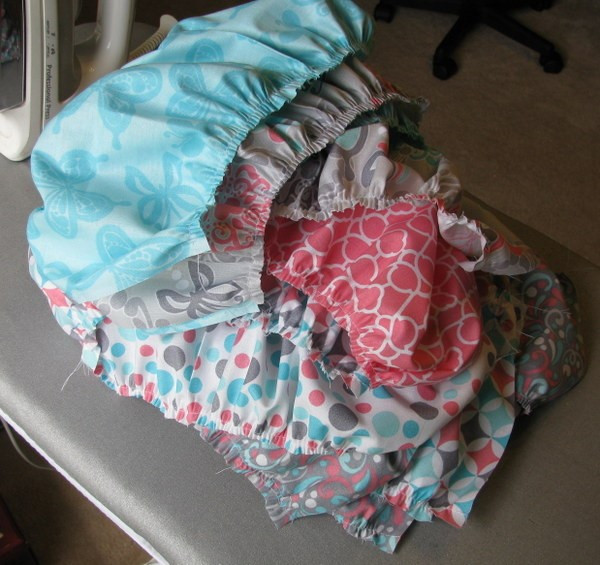
Arrange squares as desired. Note how the gathers are sometimes up and down and sometimes side to side.

-
Stitch horizontal rows of blocks together with the 4-thread Overlock stitch on your serger cutting nothing (or very minimally) off.
Keep in mind that row 5 and 6 will involve stitching the first 4 small squares together on each row and stitching those 2 short rows together. Then stitch the large square to that block of 8 small squares. Finally stitch the final 2 small squares together as a column and stitch them onto the large square. You can use Wonder Clips to hold blocks together before stitching.
TIP: When stitching the minky fabric to the gathered cotton fabric I preferred to serge with the gathered cotton fabric against the feed dogs and the soft fabric under the Teflon Foot for best feeding. Try both ways to see which one you like better and that allows for the fabric to flow under the foot best keeping the gathers looking good and the minky fabric aligned with the gathered fabric.
-
Press seams in one direction but opposite of the previous row so that the seams will nest when stitched together.
Press with care as to not press out the dots on the minky fabric.
-
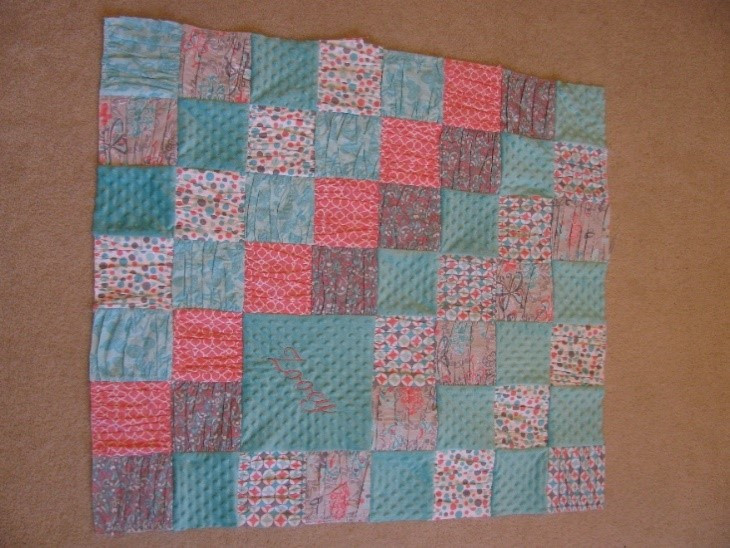
Next serge all of the rows to each other (cutting nothing to very minimal off) to create the quilt top.
I highly recommend using the Wonder Clips here to nest rows together and hold in place before stitching.
-
Square up the top and cut the minky fabric for the back to be the same size as the front.
The quilt top should be in the realm of 39” wide by 44” long but it may be slightly smaller or slightly bigger.
-
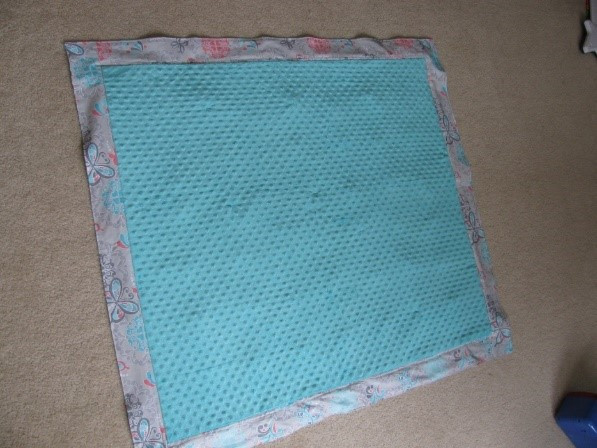
With the serger stitch 3” sashings to the two longer sides of the quilt top and square them up.
-
Serge the additional 3” sashings to the top and bottom of the quilt top and square them up.
-
Press seam allowances towards sashings.
-
Repeat sashing steps for the back side.
-
Pair front of quilt to back of quilt and hold in place with Wonder Clips.
-
Using the serger or sewing machine (with standard foot back on the machine) stitch around the entire quilt with a ¼” to 3/8” seam allowance
leaving an opening in the bottom that is large enough to turn the blanket.
-
Turn blanket and press well. Press in a seam allowance along the opening too.
-
With a 3.0mm stitch length on the sewing machine (and the standard presser foot)
topstitch an 1/8” from the edge around the entire perimeter (to also close the lower opening).
-
If using rick rack stitch down the center of the rick rack placing the rick rack just next to and outside of the seam that lies between the sashing and the blocks with like colored thread.
Tuck and conceal the start and ends as you stitch. The corners of the rick rack turn surprisingly well! This stitch will also help hold the border in place. If not using rick rack topstitch with a 3.0mm stitch length about a ¼” next to and outside of the blocks perimeter seam. With or without rick rack it is a good idea to pin through both layers of the blanket around this seam to make sure the top and bottom seams are aligned.
-
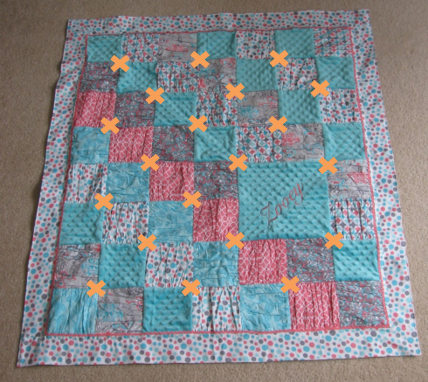
Lay the quilt out flat and place a pin at a number of small square intersections.
Use a bar tack or a zig-zag stitch (set to 0 stitch length) several block intersections to “quilt” the blanket. The X marks below are recommended places to secure. After tacking in place you’re all done!