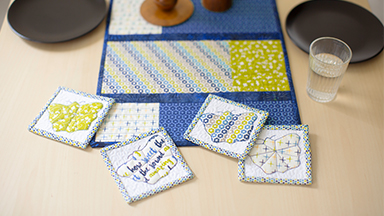
Liven up your dining table with this simple quilted table runner and matching coasters. This easy project is great for beginning quilters or sewers. Change the fabrics to match any holiday or season or dip into your fabric stash to make this home décor project match your home and personality. Try out this runner on your new Baby Lock Jubilant! Approximate size is 13 ½” x 38”. Download printable instructions.
Materials:
- ½ Yard each of 4 assorted prints that coordinate
- ½ Yard of navy print for Sashing and binding on the table runner
- ½ Yard of white cotton for coasters background
- Batting
- Madeira® Cotona thread for piecing
- Madeira quilting threads that coordinate with the fabrics
- Quilting needle Size 11
- Frixion marking pens
- Walking foot
- ¼” Quilting Foot
- Basic sewing supplies
Tools:
- Baby Lock® Jubilant sewing machine
Steps:
-
Follow the next set of cutting directions to cut the front of the table runner:
-
Cut one section each 8 ½” x 9 ½” from print one and print two.
-
Cut one each 8” x 4 ½” from prints three and four.
-
Cut one section each 5 ½” x 9 ½” from prints one and two.
-
Cut one section each 5 ½” x 4 ½” from prints three and four.
-
Cut one section each 3 ½” x 9 ½” from prints one and two.
-
Cut one section each 3 ½” x 4 ½” from prints three and four.
-
Cut five strips 1 ½” x 13 ½” from the navy print for the sashing.
-
Cut three strips 2 ¼” x 42” across the width of the fabric for the binding.
-
-
Set up the machine for sewing. Using a ¼” seam allowance throughout piece (a) and (b) sections together on the short ends to create two sections.
-
Piece sections (c) and (d) together on the short ends to make two sections.
-
Piece sections (e) and (f) together on the short ends to make two sections.
-
-
Press the seams toward the darker print.
-
Lay the section on a flat surface with the widest section placed first. Next place the next widest section to the right of the first section.
-
Rotate the sections so that you alter the pieced sections so that the short sections are reversed so that they are on opposite sides on the runner.
-
Place the third section to the right of the second section. Repeat for the other three sections.
-
-
Between each of the sections place a sashing strip. Sew the sashing to both sections on each side of the strip.
-
Press the seam toward the sashing strip. Repeat until the top section is completely pieced together.
-
-
Cut a piece of fabric that is wide enough and long enough for the backing on the table runner.
-
If you do not have a piece large enough for the backing piece several of the remaining sections together to make one section.
-
-
Create a sandwich with the backing batting and top of the table runner. Lay on a flat surface in that order.
-
Attach the walking foot replace the needle with the quilting needle and re-thread using quilting thread that coordinate with the table runner for the top thread.
-
Wind a bobbin with the same thread that is used on the top.
-
-
Quilt the sandwich together using rows of straight stitching that run the width of the table runner. The walking foot will allow the quilt sandwich to move as one.
-
To bind the table runner piece the three 2 ½” wide strips together on the short ends to create one long strip. Fold the strip lengthwise with the raw edges even and iron.
-
Starting on one of the long edges on the table runner pin the binding strip at least 8” down from the corner with right sides together.
-
-
Attach the ¼” Quilting foot to the machine.
-
Starting approximately 4” down from the pinned end of the binding strip sew the binding to the table runner.
-
When you are close to the first corner stop ¼” from the corner and cut the thread.
-
Take the end of the binding and fold it upward away from the runner while creating a 45˚ angle at the corner. Finger press to crease.
-
Bring the binding strip down over the corner so that the raw edge of the binding is even with the edge of the runner.
-
Starting at the corner sew the second side of the binding to the runner.
-
Stop at the corner and repeat these directions for the other three corners.
-
-
After you round the last corner cut away the excess binding.
-
Be sure to allow a long enough section so that you can tuck the end of the binding inside the starting point on the binding.
-
Continue to stitch the binding to the runner.
-
-
Fold and press the binding to the back side of the table runner and hand-stitch in place.
-
For the coasters using the attached template cut out four butterfly shapes from the remaining print fabrics.
-
Trace the lines onto the butterflies as shown in the template.
-
-
Cut out eight - 6” squares from the white fabric.
-
Cut four strips 2 ¼” x 25” long for the binding from the remaining prints.
-
Create a quilt sandwich with the batting placed between two of the white 6” squares.
-
Center and pin the butterfly cut-outs to the font side on each of the quilt sandwiches.
-
Sew around the outer edge of the butterflies and over the drawn lines as shown on the template.
-
Quilt around the butterfly on the white fabric using a meandering stitch or any other quilt stitch as desired.
-
Trim the coasters to a 5” square.
-
Bind the coasters by following the same directions that were used in the table runner. The starting point will be half way down one of the sides.


