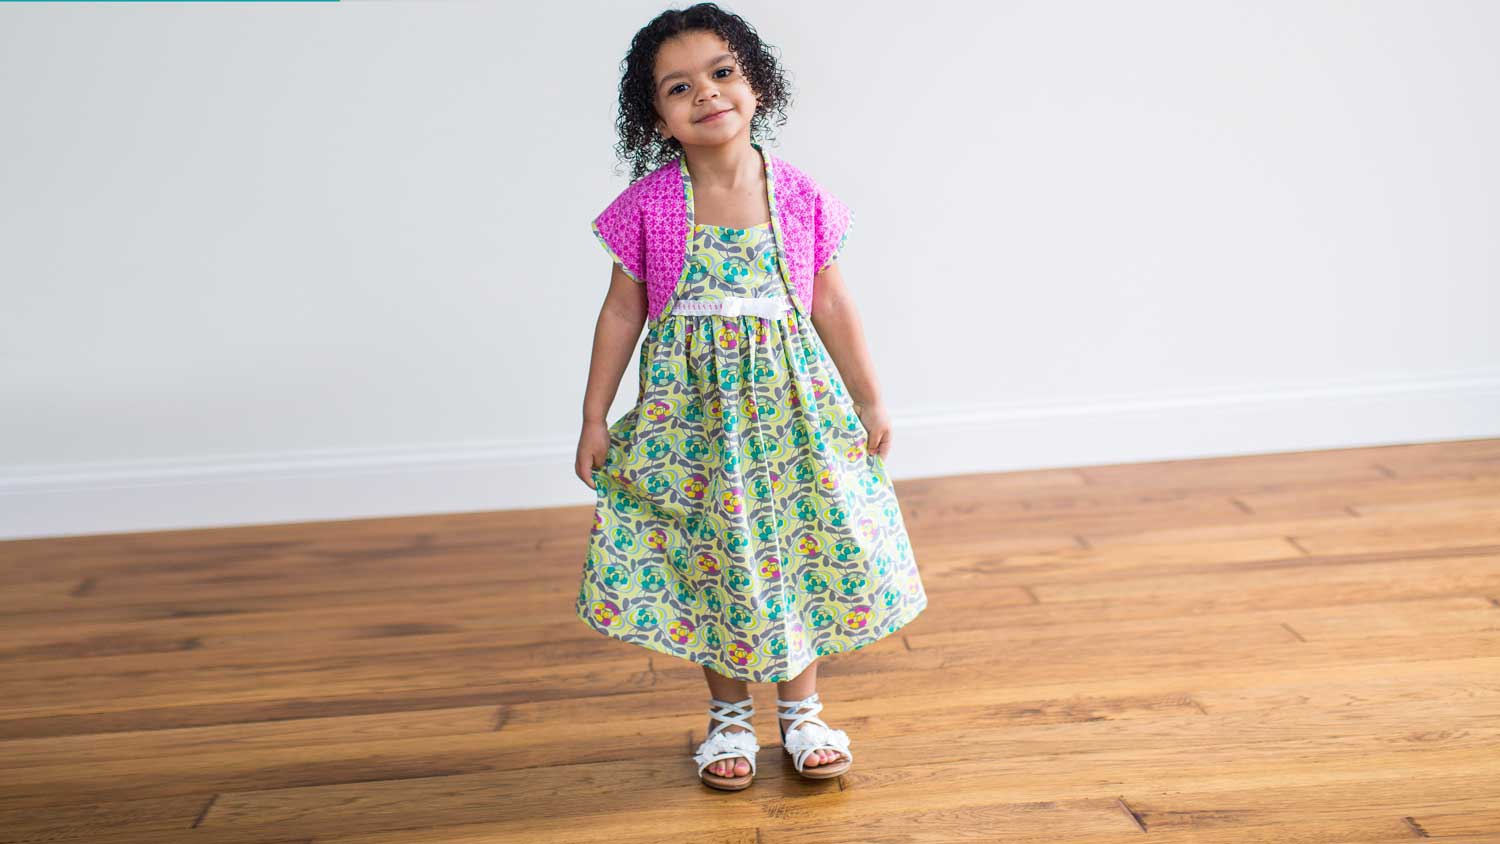
Create the perfect Easter or special occasion dress for any child while using your favorite quilting techniques! This simple dress and bolero can be made in a favorite color or fabric and you could make one for every holiday. Let your imagination run wild! Download printable instructions.
Materials:
- Simplicity Pattern 8064 or similar style
- Follow yardage and notions as listed on guide sheet for the dress
- ½ Yard of contrasting fabric
- ½ Yard of white cotton for backing
- Baby Lock Cut Away Ultra Soft Stabilizer (BLC204) 20” x 24”
- 2 Yards of ribbon for bow and sash for dress
- Madeira® Cotona thread for sewing
- Frixion marking pen
- Straight edge ruler
- Basic sewing supplies
Tools:
- Baby Lock® Jazz II sewing machine
- Walking foot (BLG-WF)
Steps:
-
Cut out the pattern pieces for View A for the dress. Disregard reference to the lace overlay for this dress it will not be used in this project.
-
To create quilted fabric for the bolero follow the next set of directions:
-
Make a sandwich by laying the white cotton backing fabric 20” x 24” stabilizer section and the contrasting fabric for the bolero on a flat surface.
-
Place the ruler 45˚ on the fabric sandwich and draw a straight line from top to bottom. Draw additional lines on the diagonal to cover the entire section 1” apart.
-
Reverse the piece and draw straight lines 1” apart from each other in the opposite direction to create a diamond shape on the fabric.
-
-
Set up the machine for quilting with the walking foot:
-
Wind a bobbin using the same thread that will be used on the top for sewing. In the sample white thread was used.
-
Thread the machine.
-
Attach the walking foot.
-
Select straight stitch #1.
-
Set the Stitch Length to 3.
-
Set the Stitch Width to the black dot between the 4 and 3. Refer to the instruction book page 15. The needle will be placed in the center of the presser foot.
-
Place the sandwich section under the presser foot with one of the center drawn lines so that the line is centered under the presser foot.
-
Sew over the line careful to keep the line centered under the needle. Stitch the other lines in the same direction. Stitch back and forth over each of the lines.
-
Rotate the section and stitch over the other diagonal lines. Always start in the center and work your way outward.
-
Press the section to remove the drawn lines and to flatten the section.
-
-
Fold the section and cut out pattern pieces 13 and 14.
-
Assemble the bolero while following the pattern guide sheet.
-
Cut two 2 ¼” wide bias strips from the dress fabric. One will be used for binding around the arms and the other to bind around the front and neck edge on the bolero
-
If the lengths are not long enough you may need to piece the bias sections together. With wrong sides together fold the lengths together and press.
-
. Place the bias strips with right sides together along the sleeve opening and stitch using ¼” seam allowance. Press the bias binding outward and fold to the back.
-
Top stitch along the front. Sew together the side seams. Repeat for the binding around the outer edge of the bolero.
-
-
Use the seam allowance as stated on the pattern guide sheet.
-
Follow the guide sheet to assemble the dress.
-
Stitch a decorative stitch on the ribbon to finish the dress by following the next set of steps:
-
Cut out the length of the ribbon that is needed.
-
Turn the pattern selection dial to stitch #27.
-
Thread the machine with a contrasting thread color to match the fabric.
-
Stitch the decorative stitch down the center length of the ribbon.
-
-
Finish the dress by following Step 33 on the pattern guide sheet.


