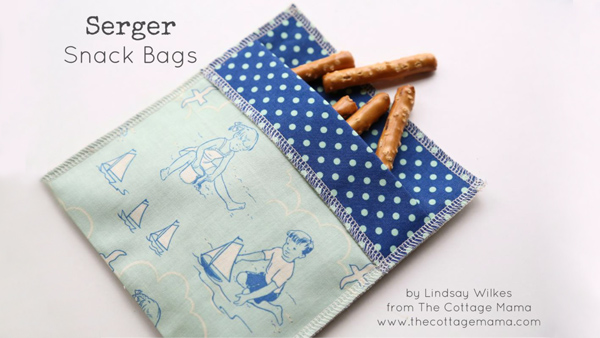
With three little kids at home Lindsay Wilkes (the Cottage Mama) goes through a lot of snack bags every day. So instead of using tons of plastic bags she came up with this super simple snack bag that she made entirely on her Baby Lock serger. These sew up so fast that you could make 20 of them in an hour. Download printable instructions.
Materials:
- 2 Pieces of woven cotton fabric cut 7" x 15"
- All-purpose serger thread
- Rotary cutter mat and ruler
- Iron
- Fray Check
- Scissors
Tools:
- Baby Lock Serger
Steps:
-
Use 1/2" seam allowance unless otherwise noted.
-
Cut two pieces of woven cotton fabric 7" x 15". Place the two pieces of fabric on top of one another with their wrong sides together. Serge one short edge.
-
-
Fold the fabric in half lining up the short edge with the serged short edge on top. Make sure the fabric you want to use as the outside of the bag is showing at this point.
-
Fold down the one serged short end of the fabric by 1.5" and press.
-
Serge both sides and the remaining short end. Be careful to feed the fabric through your serger slowly when sewing the sides to not make the fabric bunch up.
-
-
Use Fray Check or other fray blocking gel to prevent any fraying on the corners. Apply and let dry then clip any remaining threads.
-
Now your serger snack bags are complete!
-
You can make these in all different fabrics and prints. They are great gifts or just make a bunch to have around for your little munchkins.
-
And because they don't have a closure they are super simple for little fingers to open and close. Fill them with your favorite snacks fold over the fabric and go!
-


