
Designers Gallery FontWorks™ has a fun feature called Font Art that allows you to easily create fun and unique embroidery designs using all the built-in font types. This feature can also be used to create applique designs for any embroidery. Adding a fun polka dot applique to a garden flag to create a warm fall welcome is just one unique way to stitch this design. Download printable instructions. Download embroidery file.
Materials:
- 5" X 7" or 6" X 10" Embroidery Hoop
- Designers Gallery FontWorks™ Software
- Pumpkin Applique Design created in software
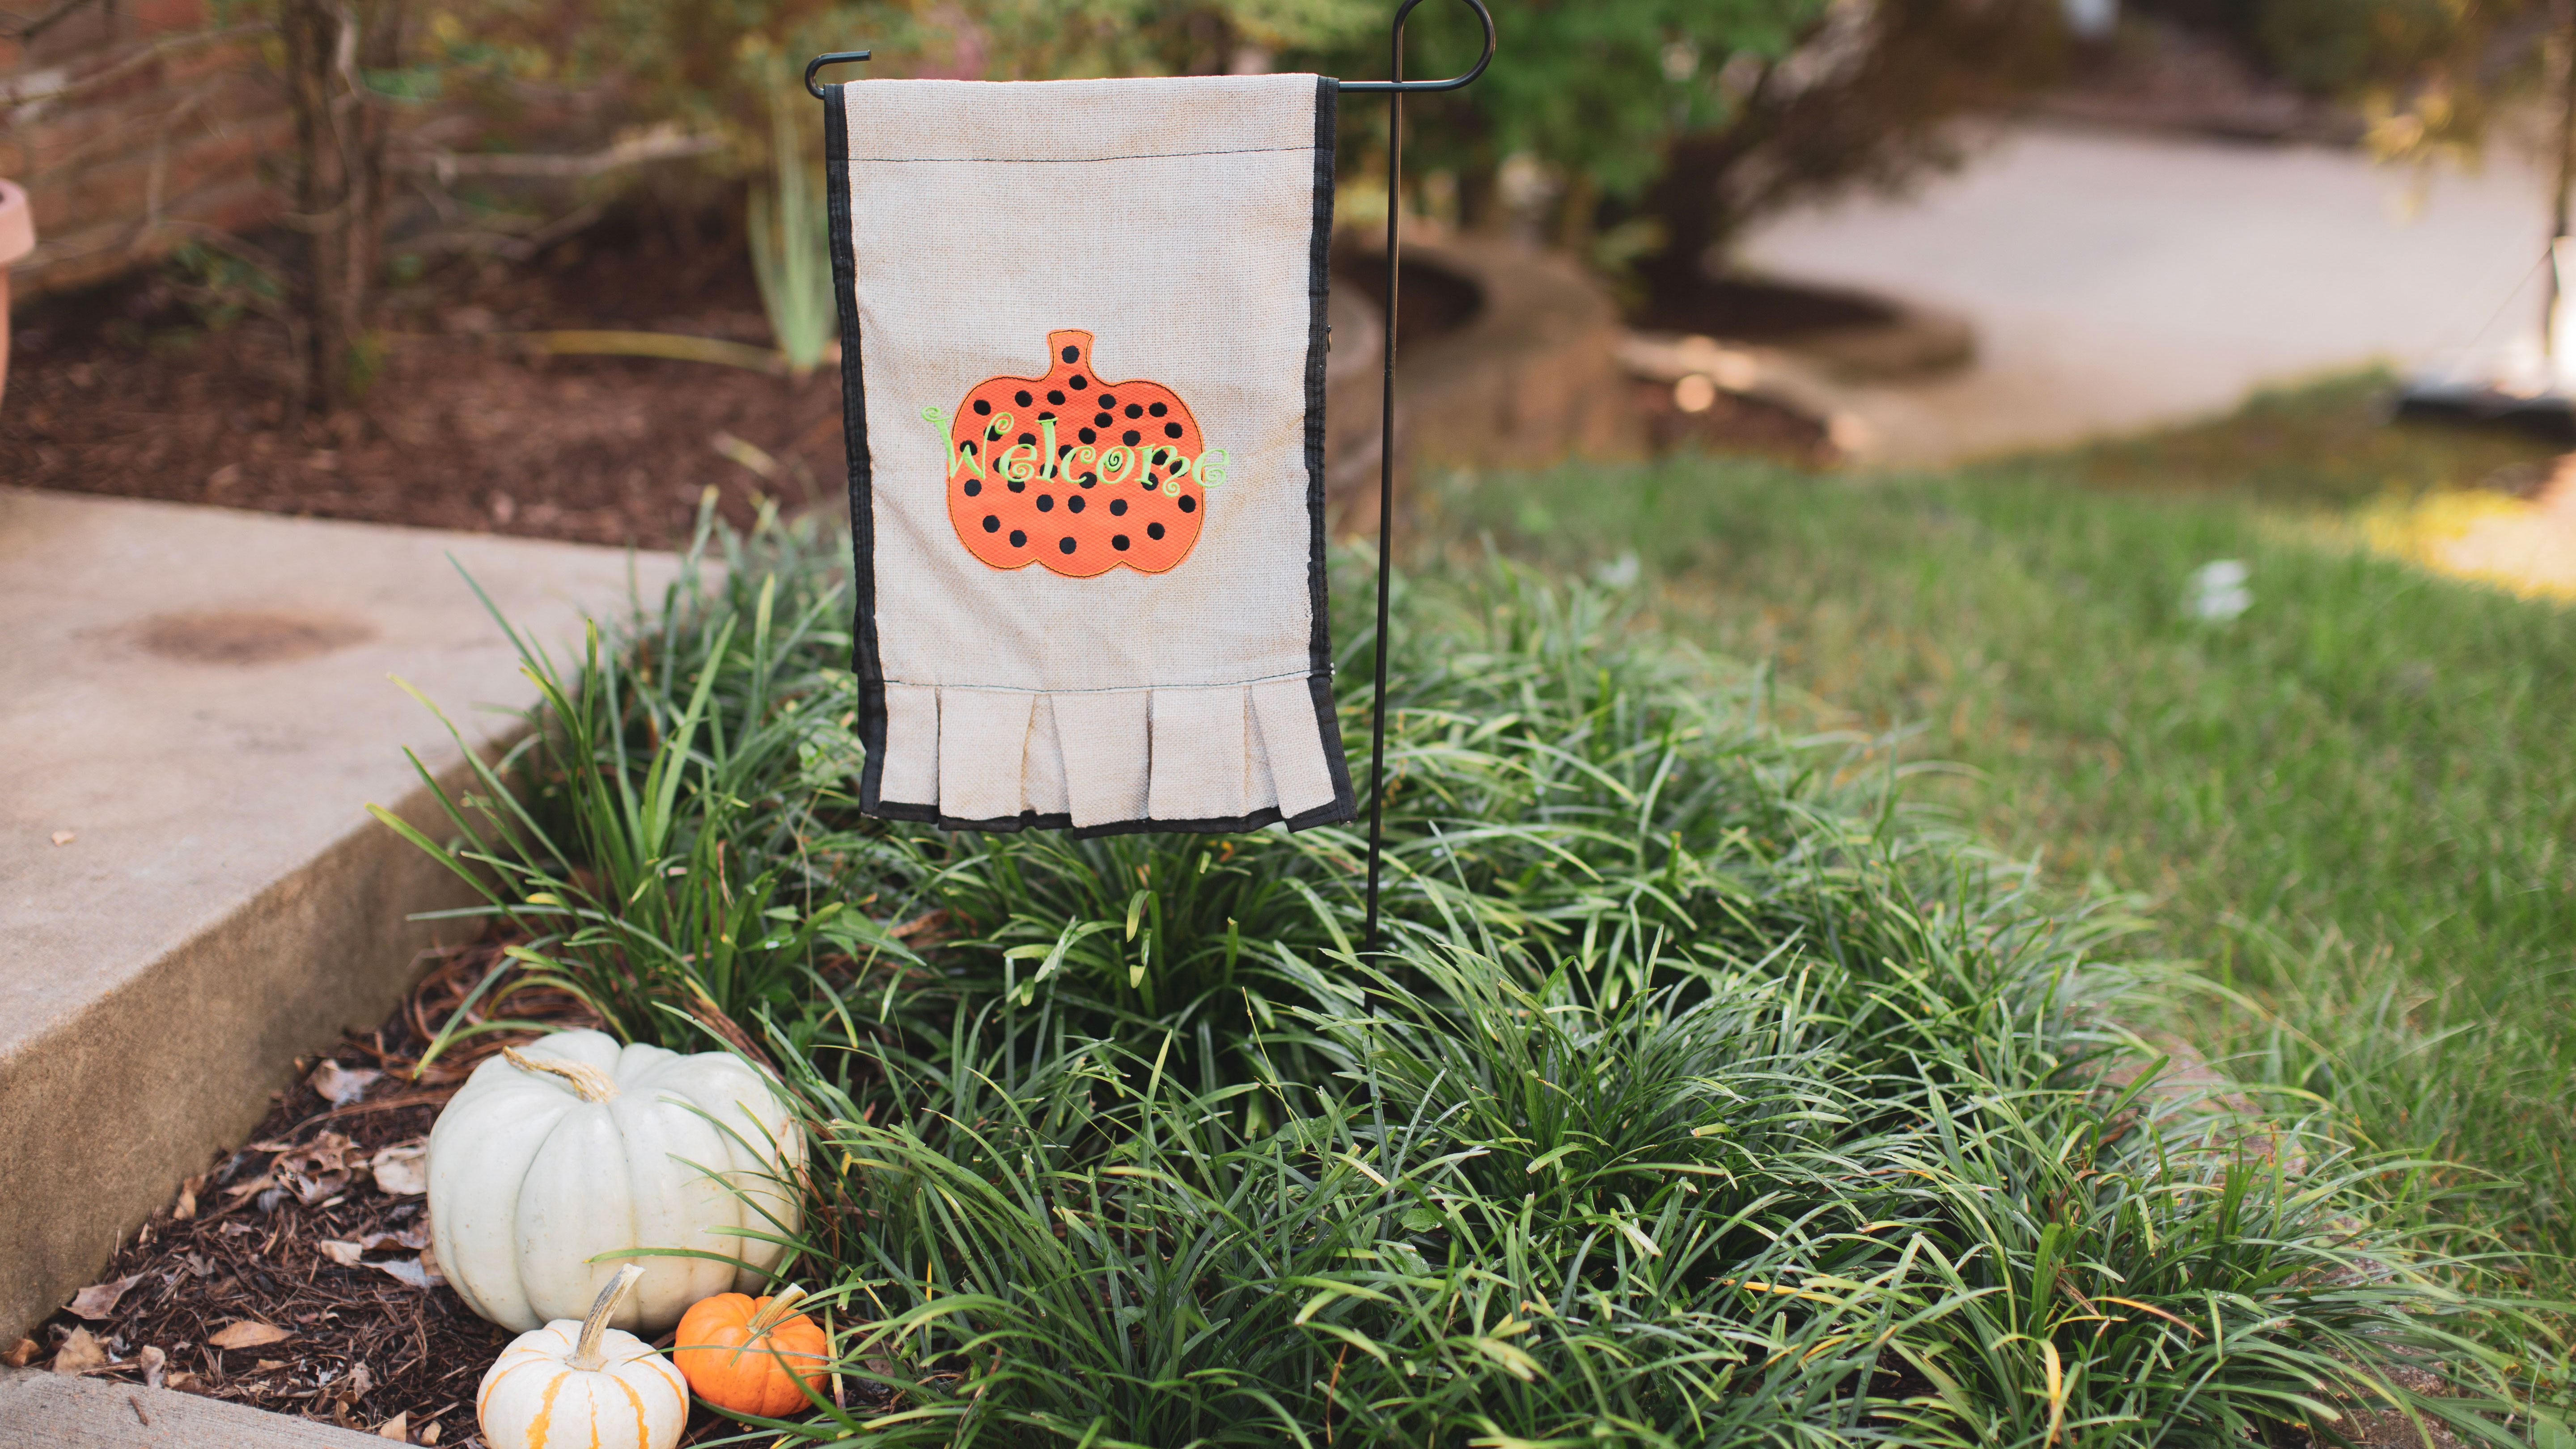
- EasyStitch 2-Sided Ruffle Garden Banner Flag or blank garden flag
- Madeira decorative embroidery thread to coordinate
- Baby Lock Stabilizer Stick Tear (BLT102)
- Orange fabric for applique
- Applique scissors (optional)
- Marking pen or Frixion pen
- Pins
Tools:
- Baby Lock Embroidery Machine
Steps:
-
Creating the embroidery design in FontWorks
-
Open the FontWorks Program.
-
Select the Font Art key from the main tool bar.
-
Under the shape column select run stitch and the pumpkin shape of your choice.
-
For the words section click to remove all words.
-
Click the Generate key. This will create the first part of our pumpkin applique.
-
Touch OK and this will bring the outline run stitch pumpkin onto the FontWorks layout page.
-
Touch the Copy and Paste key to create two run stitch outlines of the pumpkin shape.
-
Select the Font Art key from the main tool bar.
-
Choose the satin stitch option and the same pumpkin shape (note that the size was not changed. If you adjusted the size be consistent for the applique).
-
Under the Word section delete all the works as in the first step.
-
While this feature is designed to add different works you can also add a period to create polka dots. Under "Enter a new word " type in a period and click +
-
The font type Mackenzie with a height of 35mm was selected.
-
For the Art Settings you can adjust the Max Paths and Max Colors. For this example we set it at 35 and chose one color for the dots.
-
To make the dots all the same size adjust the Min and Max scales to both be 100%.
-
Click Generate. This will preview a layout. You can continue to click Generate to get a new preview. Once you get one that you like click "OK."
-
This will place the design on top of the two prior run stitch pumpkins.
-
Once on this page you can individually select the dots and move them as desired.
-
To add a unique look for our design select Font Art again and add a bean stitch outline to stitch over the satin stitch.
-
The final step of the design creation is to simply add the word "Welcome" over the top of the pumpkin design.
-
Click the "Text" feature and click on the layout page. Type in "Welcome" and place it over the center of the pumpkin. We used font style Lizzie.
-
Name and save the design as a .pes file to a USB to bring to the machine.
-
-
Hooping the flag:
-
Gather all of your supplies for the project.
-
Cut your stabilizer a little larger than the hoop of your choice.
-
Place the stabilizer inside the hoop and carefully spray the stabilizer with temporary adhesive spray.
-
With marking pen measure and mark the center of the garden flag front. A Fixion pen was used for this project. You may want to test on your fabric for optimal finished results.
-
Unzip the flag so that you can access the front portion of the flag. You have the option to hoop the flag front with the stabilizer or float the flag on top of the stabilizer.
-
Place your hooped flag onto your machine. Check to make sure any excess fabric is clear of the hoop and needle area.
-
Thread your machine with the thread color of choice.
-
-
Stitching your embroidery:
-
From the Home screen your machine select icon to retrieve your design from the USB or storage device.
-
Complete any other desired embroidery editing with your design.
-
If your machine has the capability select the Basting stitch Icon to help secure the flag in the hoop.
-
Position your design to ensure your design is aligned with the center mark of the pillow.
-
For an applique design there are traditionally three stitch lines to create your embroidery: placement mark tack down of fabric or decorative stitching.
-
For this applique orange pique fabric was used.
-
When ready to embroidery lower the foot and the Start/Stop button.
-
When stitching the applique you would want to stitch the placement stitch place the fabric over that stitch line and then stitch the tack down stitch.
-
Trim any excess fabric after this step. Using applique scissors helps to trim close to the stitch line.
-
Stitch the remaining decorative stitching which will encase the raw edges of the fabric. Change threads as desired.
-
When embroidery is complete remove the frame from the machine and unhoop the flag.
-
Gently remove the basting stitches and pull the tear-away stabilizer from the back of the flag front. Zip up the side of the garden flag.
-
Place on a garden hook and welcome your guests or goblins!
-


