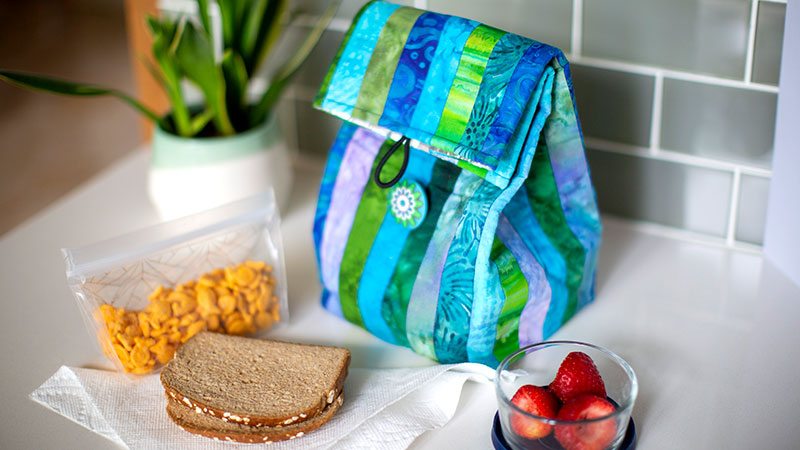
Eat healthier; bring your lunch to work or school! It can be customized to fit your specific food containers and made large enough to include an ice pack. Pack your meal in this insulated bag to keep your lunch food-safe and look stylish while doing it. Download printable instructions and template.
Materials:
- Scraps of cotton batiks; at least 22” long x 1 ½” wide
- 7/8 yard of Solarize Fabric by Fairfield insulating thermal barrier fabric
- ¾ yard of cotton batting
- One large button
- One elastic pony tail holder
- Pellon Pattern Making Tru-grid or a large sheet of paper
- Water soluble marker
- Madeira Cotona thread
- Basic sewing supplies
Tools:
- Baby Lock Sewing Machine
- Molly Foot Kit (BL30A-Feet) or foot kit to fit your machine
- Snap on Walking Foot-Low Shank (BLDW-L)
Steps:
-
Cut 27 (1 ½” x 22”) strips from the scraps of batiks.
-
Set up the machine for sewing:
• Attach the shank from the foot kit. • Snap on the ¼” foot. • Thread the machine. • Place a bobbin in the bobbin case.
-
Stitch the strips together in a random color order.
Keep the strip set from bowing in one direction when sewn by stitching two strips together top to bottom; add another strip and stitch from the bottom to the top of the strip set. Continue adding strips stitching top to bottom and bottom to top of strip set until all strips are stitched. Press the strip set with the seams going in the same direction.
-
Prepare the strip set for quilting; lay the strip set onto a piece of batting right side facing up pin the strip set securely to the batting.
-
Quilt the strip set as desired. In the sample it was quilted by using a stitching-in-the-ditch technique using a complementary colored thread.
-
Following the lunch bag pattern diagram draw a pattern on Tru-grid or paper using the template at the end of this document.
-
Lay the pattern on top of the quilted strip set and pin to the strip set. Carefully cut out the lunch bag.
-
Stitch the pony tail holder to the top edge of the lunch tote; 3 ½” from the longest side of the lunch bag.
Pinch the pony tail holder together and slowly stitch over the band; securing it within the 1/4” seam allowance. Allow the larger section of the loop to lie towards the center of the bag.
-
Cut a piece of the solarized fabric 28 ½” x 21”.
Note: the top edge measurement is wider than the top edge of the lunch bag.
-
With right sides of the lunch bag and the solarized fabric facing pin the top edge together; allow the extra 1” of solarized fabric to extend beyond the seam allowance at the shorter end of
Carefully stitch over the pony tail loop.
-
Turn the solarized fabric to the back side of the quilted strip set. Pin and top-stitch along the folded top edge of the lunch bag. Keep the elastic band free from stitching.
-
Lay the lunch bag flat. Pin the quilted layer and the solarized fabric layer together. Trim the solarized fabric at the bottom edge to the same size as the quilted fabric
-
Stitch the side seam of the lunch bag together right sides of the batik strip set facing include the solarized fabric into the seam as well.
-
Fold the 1” of solarized fabric over the side seam encasing the raw edges of the side seam allowance. Top-stitch the seam and trim away the excess solarized fabric.
-
Pin the bottom of the lunch bag to the front back and sides. Clip the sides of the lunch bag as needed within the ¼” seam allowance. Stitch the bottom of the lunch bag to the sides.
-
Turn the bag right sides out and press into a paper bag shape.
-
Fold over the top of the lunch bag and mark the placement for the button closure. Hand-stitch the button securely.


