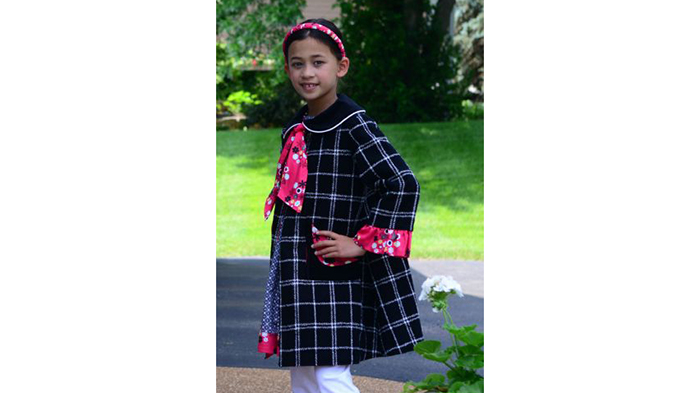
This child’s coat is a great project to try when learning how to line up directional or patterned fabric. Use a large plaid pattern for simpler matching and fun smaller prints for contrast. Remember to keep many pins on hand. Pinning is the key to successfully lining up fabrics! Download printable instructions.
Materials:
- Black and white plaid fabric for main areas on the coat
- Black velveteen fabric for collar and pockets
- Lining fabric (red floral cotton)
- Sew Classic Clothes for Girls Lindsay Wilkes
- Walking foot
- Pins
- Ruler and marking pen (optional)
Tools:
- Baby Lock® Sewing Machine
Steps:
-
Buy approximately 25% more than what the pattern calls for. If you have a very large plaid buy additional yardage.
-
This coat pattern is perfect for this project since it doesn’t have too many pattern pieces.
-
The more seams you have the more lining up will be required.
-
In the coat there are two side seams and the two seams for the sleeves. The collar and the pockets used a solid black velveteen fabric.
-
-
At the Cutting Table:
-
First lay out your fabric on your cutting table folding in half. See how quickly the stripes become unaligned.
-
-
Match the plaid strips both vertically and horizontally.
-
Line up every plaid intersection and pin them together. This is the best way to ensure perfectly-matching plaids for both layers.
-
-
Now line up the intersections one-by-one.
-
Starting close to the fold line push the first pin through both layers of fabric and notice where the pin enters the second layer.
-
If it does not intersect at the same position as the first layer adjust the position on the second layer so that the plaids match.
-
Once they are lined up pin the intersection. Work across the fabric toward the salvages pinning each intersection so that the top and bottom layers match.
-
Repeat for all of the rows where the plaids intersect. This will be time consuming but the end result will look great.
-
Before you move on to the next intersection always double check to be sure that the plaids are perfectly aligned.
-
Place all the pins in the same directions. This will help for removal of the pins later.
-
-
After you have a section large enough for the pattern back section of the coat place the pattern piece on the fold line on the fabric.
-
Cut out the section but be aware of the location of the pins. Remove pins as needed while maintaining the positon of the layers.
-
Tip: If you have enough pins you could pin all intersections until your whole piece of fabric is pinned.
-
Alternative: open the fabric and cut each pattern piece twice. You would match fewer plaid intersections but mark more plaid lines on pattern pieces.
-
-
Since the pattern that is being used is for a child and the width of the fabric is 60” wide both the front and back sections will fit on the same width of the fabric.
-
Pin the front pattern section next to the pattern back section.
-
In order for the side seam plaids to match with the back section plaid match the notches on the front pattern piece with the notches on the back pattern piece.
-
Always double check to be sure that the plaids line up.
-
-
Line up the plaids for the sleeve section.
-
Place the pattern for the sleeve on the fabric.
-
Match the notches on the sleeve to the notches on the front and back pattern sections.
-
Cut out the sleeves. Don’t forget to remove the pins as needed before cutting.
-
-
In the sample velveteen fabric was used for the collar and the pockets.
-
Continue to follow the instructions from the pattern book to finish the coat.
-
In the sample velveteen fabric was used for the collar and the pockets. Cut them out at this time.
-
-
Using the red floral cotton cut out the lining ruffle for the bottom edge of the sleeve and the tie for the coat.
-
At the Sewing Machine:
-
Set the machine up for sewing and attach the walking foot.
-
Follow the directions from the pattern book for assembling the coat.
-
When sewing the side seams pin the front and back together being careful that the plaids line up.
-
Sew the seams together using the walking foot.
-


