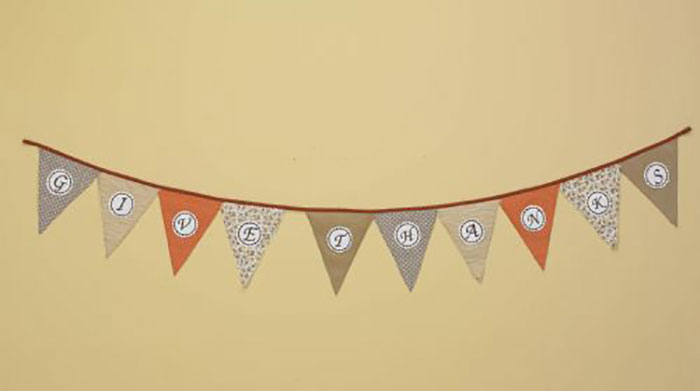
Decorate your home for Thanksgiving with this quick and super cute banner! This bunting is an easy project that can be adapted with different words and fabrics to match any event or occasion. Download printable instructions.
Materials:
- Embroidery thread
- All-purpose thread to match fabrics
- Pattern scrap fabrics to make 10 triangles 10” long and 8” inches wide at the top
- 1 package of ½” Extra Wide Double Fold Bias Tape (3 yds)
- Fabric Glue
- Heavy weight Cut-Away Stabilizer
- Pinking Shears
Tools:
- Baby Lock Sewing Machine
Steps:
-
Cut out ten triangles with pinking shears. Triangles should be 8” wide at the top and 10” at the longest point.
-
Sew a straight stitch about ¼” along the two longest points to prevent fraying.
-
Hoop the scrap fabric for the letters and the Cut-Away Stabilizer.
-
On embroidery machine make ten 3” circle frames.
-
Inside each circle use embroidery machine to embroider single letters to spell out “GIVE THANKS.” We made the letters around 2” each.
-
-
After all letters inside circle frames have been embroidered using pinking shears cut around each frame.
-
Using fabric glue attach each circle with letter to the center of each triangle banner to spell out “GIVE THANKS”
-
Open double fold bias tape once line up the top of each triangle along the middle of the bias tape fold back over and pin in place.
-
Sew along the bottom of the bias tape to sew it shut and sew triangles into place.
-
We also used a wide decorative stitch to ensure triangles were securely sewn into the bias tape and add that little bit of cuteness!
-
-
Fold over the two ends of the bias tape and sew to make two loops in which to hang the banner.


