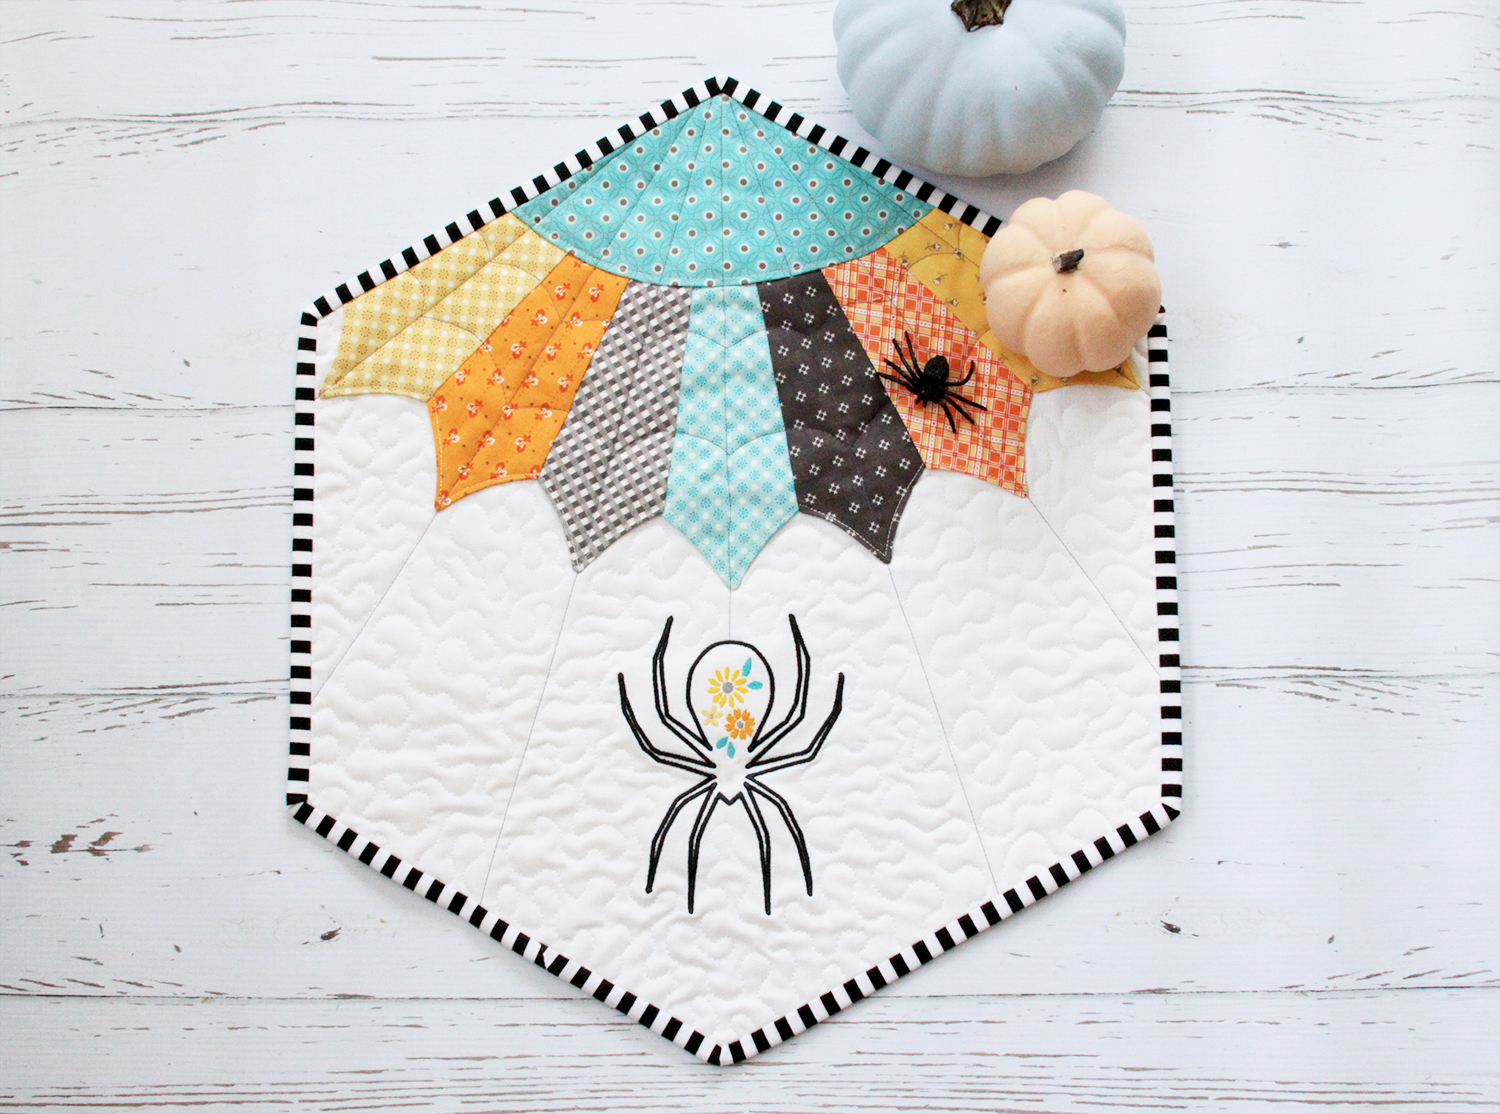
This Halloween Mini Quilt takes the spooky out of Halloween with this sweet floral spider and her colorful Dresden spiderweb! It's quick to sew up and a great way to show off your fun fall fabrics! Download the Dresden Web Pattern and spider design here.
Materials:
- White background fabric- 3/4 Yard
- Baby Lock Stabilizer
- 7 pieces of fabric for Dresden web pieces- 5" x 10" each
- 1 piece of fabric for top of Dresden web- 10" x 10"
- Lightweight fusible interfacing – 10” x 10” piece
- Batting- 24” x 24” piece
- Fabric for backing- 24” x 24” piece
- Fabric for binding-1/4 yard
- Embroidery thread for machine embroidery
- Quilting Thread
- Basic Sewing Supplies
Tools:
Steps:
-
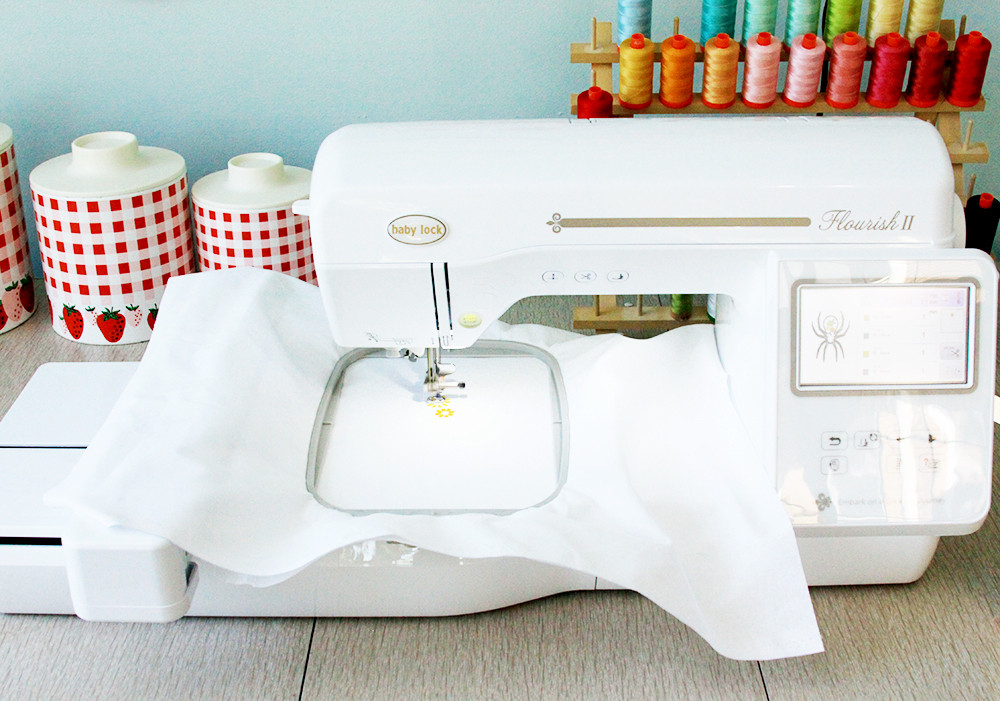
Complete the embroidery portion of the mini quilt first.
-
Load the spider design in the machine. For spider placement tape together the mini quilt layout and place fabric over paper pattern.
-
Mark center of spider location with a disappearing marking pen.
-
Add embroidery stabilizer behind white background fabric so marked place is centered in hoop and embroider design on the fabric according to the design.
-
-
The finished spider should look like this!

-
Remove fabric from hoop and set aside for now.
-
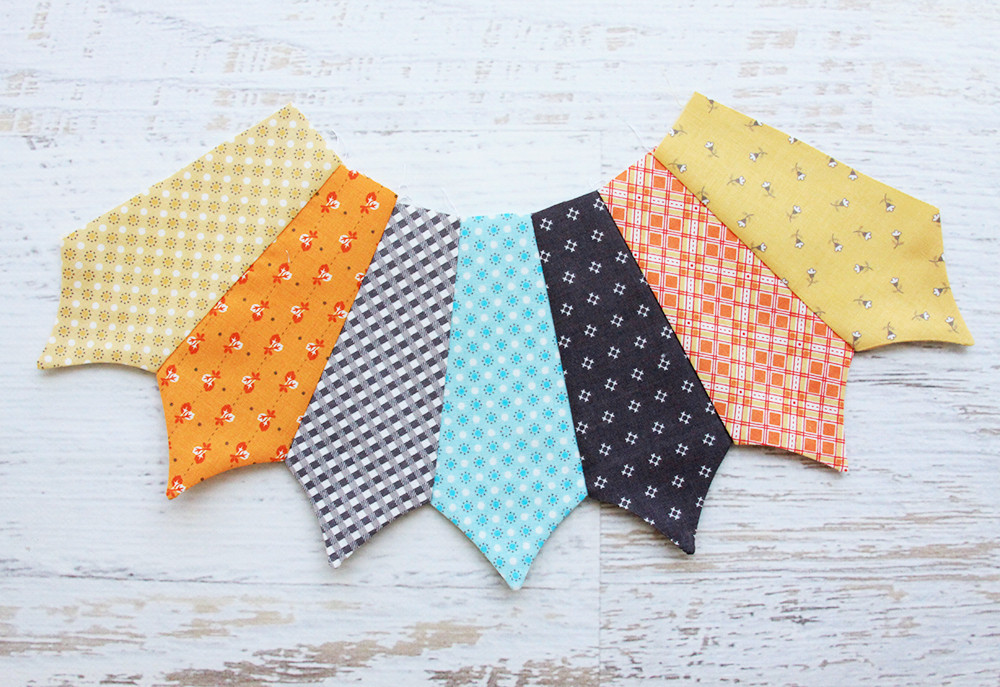
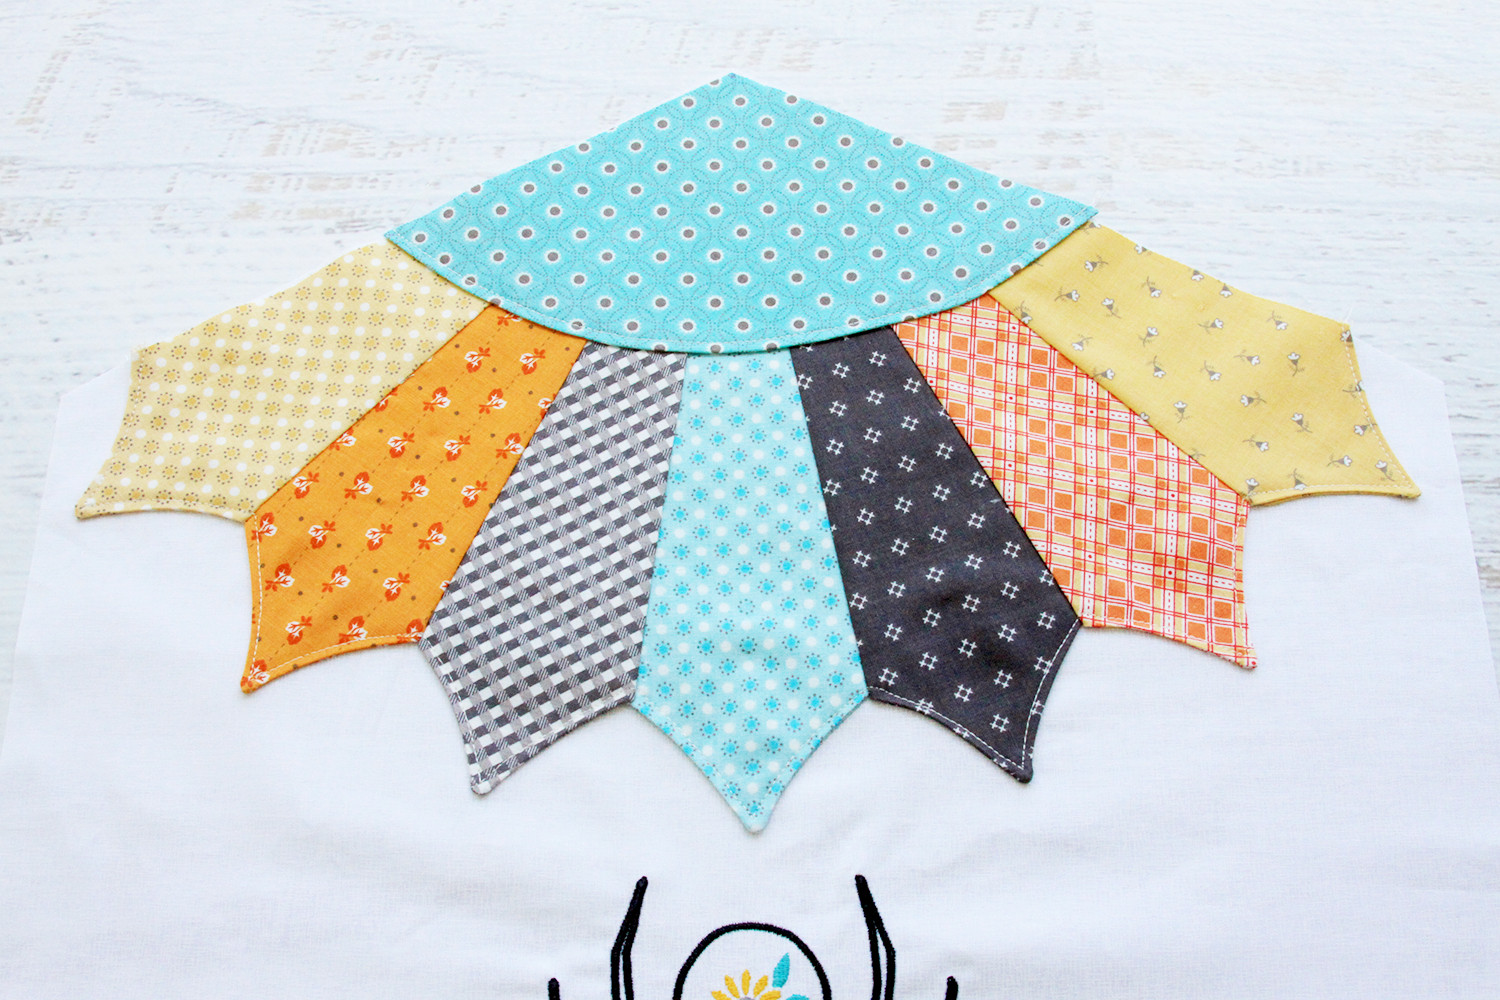
Using the provided Dresden Web pattern cut out a Dresden fan piece and facing piece from each color for your spiderweb.
-
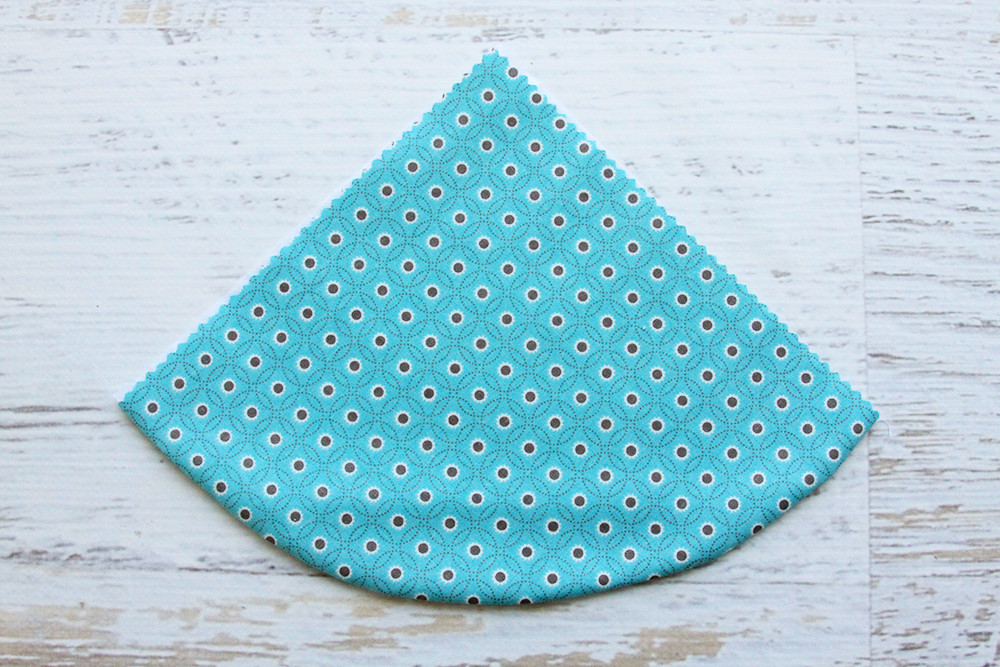
Place the facing piece right sides together with the fan piece and sew together along the two top curved edges making sure you have a nice point at the top.
-
Clip the point and turn right side out. Press seam.

-
Repeat for all seven Dresden Web fans.

-
Sew together Dresden fans to form the web. Press seams away from the center fan.
-
For the top of the web trace the curved design onto the non-fusible side of the fusible interfacing.
-
Place the interfacing on top of the web top fabric with the fusible side of the interfacing towards the right side of the fabric.
-
Sew along the marked curve line then cut away the remaining fabric leaving a small 1/8” seam allowance.
-
Turn right side out and finger press. Do not press with an iron yet.
-
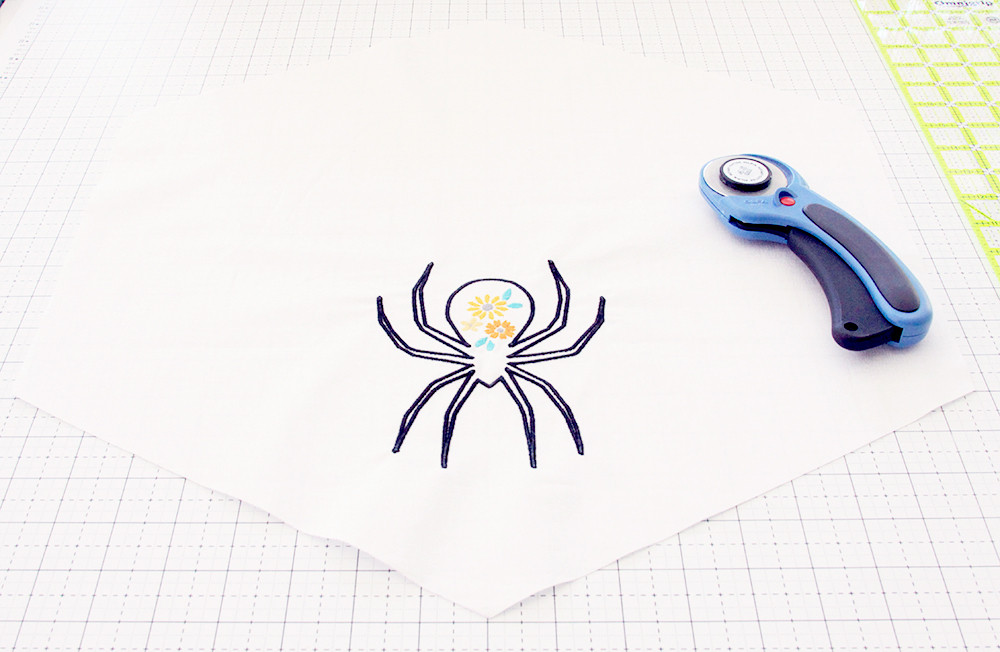
Using the paper pattern as a guide trim the fabric you've embroidered the spider on down to the hexagon shape of the mini quilt.
-
Make sure your spider is centered in the hexagon.
-
Place Dresden web at top of hexagon using the paper pattern as a guide for placement.
-
Place web top over the top of the Dresden web so the raw ends of the Dresden pieces are covered.
-
Press the web top in place so the piece is fused to the background.
-
Sew down the Dresden Web and top by sewing 1/8” inside all points and the curved top.
-
Using the pattern as a guide draw web lines onto mini quilt with a disappearing ink pen.
-
The straight lined should go through each point and the center web line should end at your spider.
-
Layer together the quilt top batting and backing and pin or spray-baste in place.
-
Sew the quilted web lines in place with a contrasting thread that stands out well against your fabric colors.
-
If desired quilt the remainder of the mini quilt. I used a free motion meandering design in the white space between the web lines.
-
-
When you are finished quilting trim off your backing and batting and straighten up your hexagon.
-
Bind as desired. Show off your cute new Spiderweb mini quilt!


