
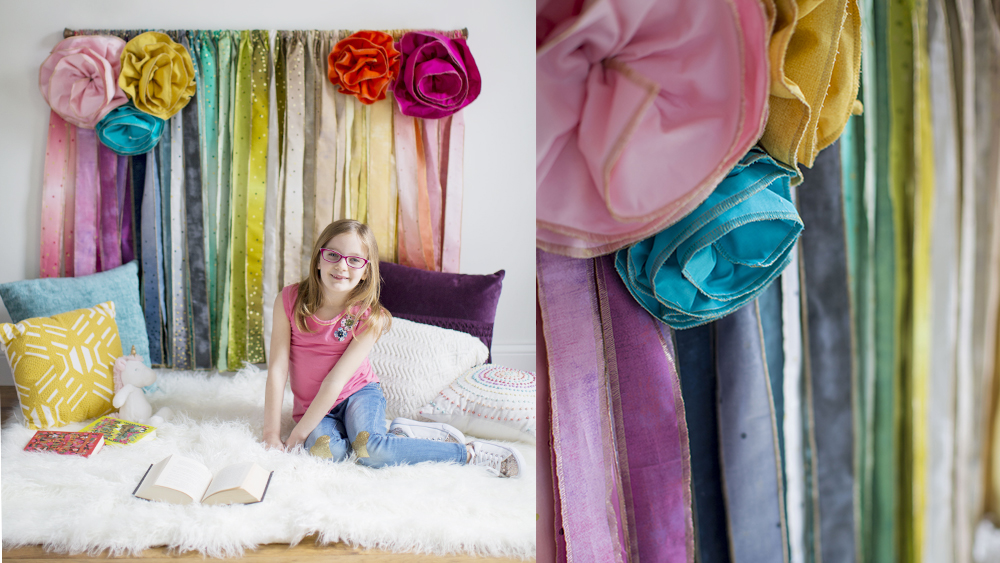
Add a punch to any party or room decor by creating a fun backdrop or wall hanging using your Baby Lock serger! It is easy to make using some colorful thread and pre-cut strips of fabric. Add a few whimsical flowers using the differential feed and elastic foot add some pizazz to this project which would look great for a first birthday or a shower!
Materials:
- Pre-cut fabric strip sets
- Miscellaneous fabric for fabric flowers
- Felt fabric for attaching the fabric flowers
- Shapeflex
- Baby Lock Ultra Soft Stabilizer BLC204
- Madeira serger thread
- 12 Gauge wire or floral wire
- Madeira Aerofil sewing thread
- Fray Check or Fray block
- Rotary cutter ruler and mat
- Curtain rod
- Basic Sewing Supplies
Tools:
Steps:
-
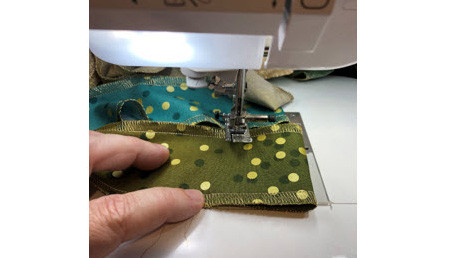
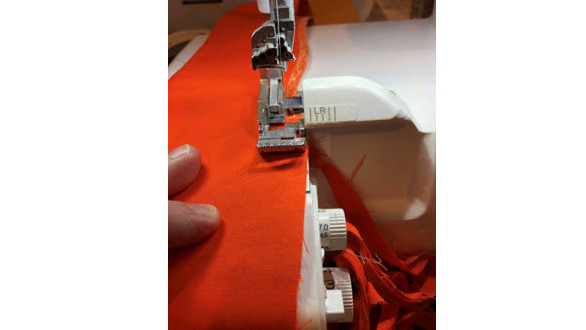
FABRIC STRIPS: Set-up the Serger for a 3-thread overlock wide stitch with gold thread in the upper and lower loopers.
-
Set the stitch width to the 7.5 and the stitch length to 3-4.
-
-
Locate your 2.5” fabric strips
-
Serge along the edges of the fabric strips
-
-
Change your machine to a try different overlock stitches.
-
Set-up the Serger for a narrow hem with a stitch length of 2.
-
Serge along the edges of the remaining fabric strips.
-
Apply Fray Check or Block to the ends and once dried trim the excess serger threads.
-
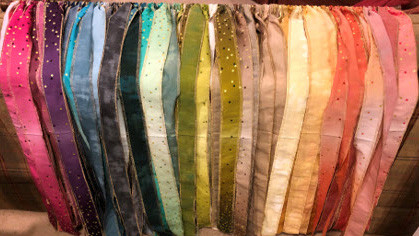
Make a casing on each of the fabric strips by turning over the edge of the fabrics over about 2”.
-
Stitch along the tops of each fabric to create a casing.
-
-
Press any creases out of the fabric strips (if needed).
-
Slide the folded edges of the fabric strips onto the curtain rod in the color order of choice.
-
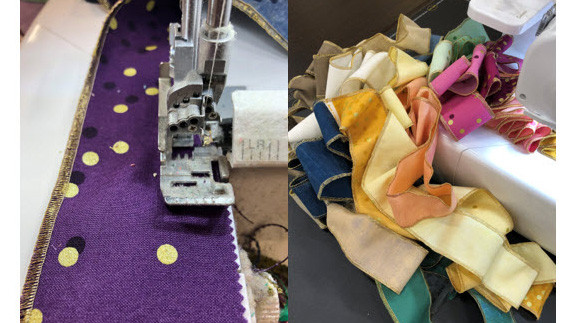
FABRIC FLOWERS: Cut 2 strips by the width of the fabric. Sew the two strips together to make one long strip.
-
Large flower=12 in strips Medium flower =10 in strips Small flower= 8 in strip.
-
-
Cut the fusible stabilizer the length of the strip and ½ the width. (i.e. large flower would be 2X the WOF and 6” wide)
-
Fuse the stabilizer to one half of fabric and press the fabric in half with wrong sides together. Pin to hold in place.
-
Along the raw edge side of the folded fabric cut a waved edge to simulate a flowered edge.
-
You can skip this step and use the serger cutting knife to cut a curved edge while stitching
-
-
Set-up the Serger for a 3-thread overlock wide stitch with gold thread in the upper and lower loopers. Set the stitch width to the 7.5 and the stitch length to 2-3.
-
Serge along the curved edge of the flowers and the two shorter ends.
-
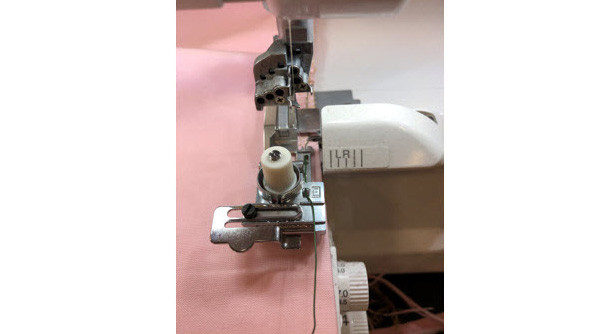
Attach the Elastic Foot
-
Adjust the stitch length to be 4 and the Differential feed to 2.
-
Cut a piece of the 12 gauge wire the length of the fabric.
-
Insert the wire into guides on the left side of the foot.
-
Lay the folded non-serged edge of the flower under the foot.
-
Serge along the edge ensuring that the wire is encased in the serged stitches.
-
After stitching along the entire edge use the wire to further gather the fabric
-
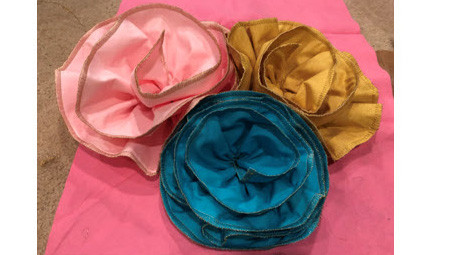
Form the gathered fabric into a flower shape.

-
Either hand-sew or hot glue the gathered fabric to secure the flower shape.
-
These can be attached to a piece of felt and pinned or secured to the fabric strips to add decoration to the fabric banner.
-
Add a stiff stabilizer if needed to prop up your flowers.
-
-
Hang your banner to create wall art or as a fun fabric backdrop.


