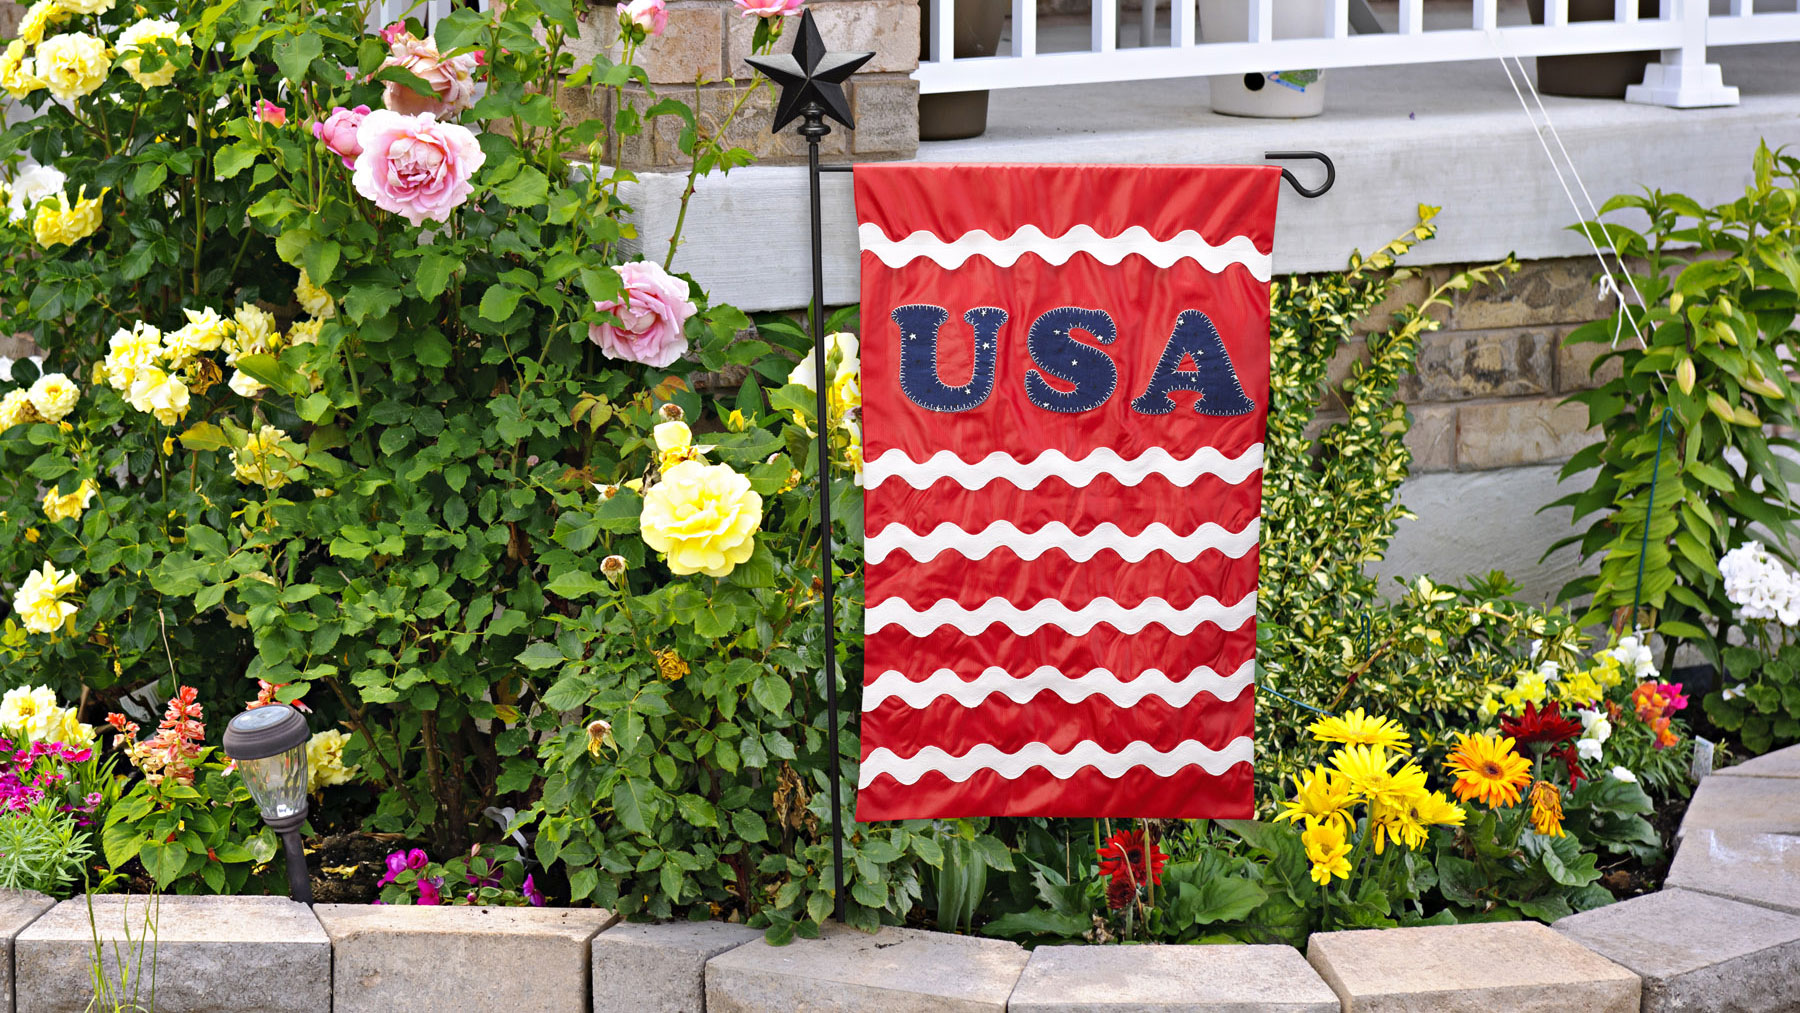
Applique becomes super quick and easy when using a die-cutting machine like the Accuquilt Go! See how easy it is to add lettering as you create this patriotic garden flag. It’s perfect to display at holiday BBQs and all summer long! Download printable instructions.
Materials:
- 1 navy blue star fat quarter for appliqué
- 1 yard red nylon flag fabric
- 5 yards jumbo white rick-rack for strips
- Madeira® white embroidery thread
- Baby Lock Appliqué Fusible stabilizer
- Baby Lock® Tear-Away Soft stabilizer
- Temporary spray adhesive
- Chalk marker
Tools:
- EmbroideryWorks™ Everyday or Advanced from Designer’s Gallery® with the new AccuQuilt®
- Baby Lock® sewing and embroidery machine
- AccuQuilt® GO! Cutter
- AccuQuilt Die #55092 Letters A-M Letters N-Z
Steps:
-
Open the program by clicking on the EmbroideryWorks icon on the desktop.
-
Set up the workspace with the 200mm x 300mm hoop.
-
Click on Preferences and select the Hoops category. Select the .pes file format from the complete list of hoops.
-
Select the 200mm x 300mm hoop. Place a check mark next to Rotate 90° and click OK.
-
-
To merge the letters to one hoop follow the next set of steps:
-
Click on the Merge Designs icon on the top toolbar.
-
Click on the down arrow under the Catalog tab and select the AccuQuilt Appliqué category.
-
Scroll down and select the 55092 Letters N-Z.
-
Hold down the Ctrl key then select the “U S” letters and click on OK to place the letters on the workspace.
-
Select only the “U” and move to the left side of the hoop.
-
Select only the “S” and move to the center of the hoop.
-
Merge the letter “A” to the workspace and place on the right side of the hoop.
-
Place each of the letters on the same horizontal grid line so that they set level and have spacing equally between each of the letters
-
Under the Object toolbar click on Select All.
-
Click on Center Designs in the Hoop icon to center the letters in the hoop.
-
Under the Properties field select the Appliqué tab.
-
Change the Border to a blanket stitch by clicking on the down arrow and select Blanket. Rely on all the other default settings.
-
-
Click on File Save As (Stitch and Working File). The working file format is .be.
-
Click on the Print icon to print a template for exact placement of the design.
-
At the Cutting Table:
-
Cut two pieces from the red nylon fabric 20” x 12½”.
-
Measure 4½” down from the top edge and mark with a chalk line across the width of both red sections.
-
Pin the printed template to the front section with the top of the template even with the chalk line.
-
Fuse the Baby Lock Appliqué stabilizer to the back side on the navy blue star fabric while following the manufacturer’s directions.
-
Using the AccuQuilt Go! System cut out the three letters “USA” using the GO! Die 55092 Letters. Place the fused fabric upside down over the letters and cut out the three letters.
-
-
With the machine set up for embroidery retrieve the USA design.
-
Hoop the tear-away stabilizer and spray with the temporary spray adhesive. Place the templated red fabric in the center of the hoop.
-
Place a positioning sticker over the cross marks on the template.
-
Select the Positioning icon on the machine and allow the machine to center the design in the hoop based on the location of the positioning sticker.
-
-
Embroider the design while following the color stops.
-
The first color stop for each letter unit is the positioning step and is used to perfectly place the appliquéd shape.
-
When the machine stops place the first AccuQuilt letter over the stitched outline of that letter.
-
In the sample white thread was used for both color stops. No need to change threads. Press the start button and embroider the letter. Repeat for the remaining two letters.
-
-
Repeat for the back of the flag.
-
Sew the five rows of rick rack evenly spaced below the lettering on both the front and back sections.
-
Be careful that the rick rack lines up on the side on both the front and back sections.
-
-
Along the top edge mark place a chalk line 2½” down from raw the edge.
-
With right sides together and using a ½” seam allowance sew the front sections to the back along the top edge.
-
With a pressing cloth and a cool iron press the seam open. Refold the section together with the right sides facing each other and pin in place.
-
Starting at the 2½” marked line sew around the flag ½” from the raw edges and ending at the opposite 2½” mark.
-
This creates a slot at the top on the flag so that you can insert the flag rod.
-
-
Turn the flag with right sides out through the opening at the top. Again using a pressing cloth iron with a cool iron along the seam lines for a crisp clean edge.
-
Place a piece of rick rack on both the front and back over the 2½” chalk line and sew the rick rack to secure. Be sure that the side seam allowance is turned inward.


