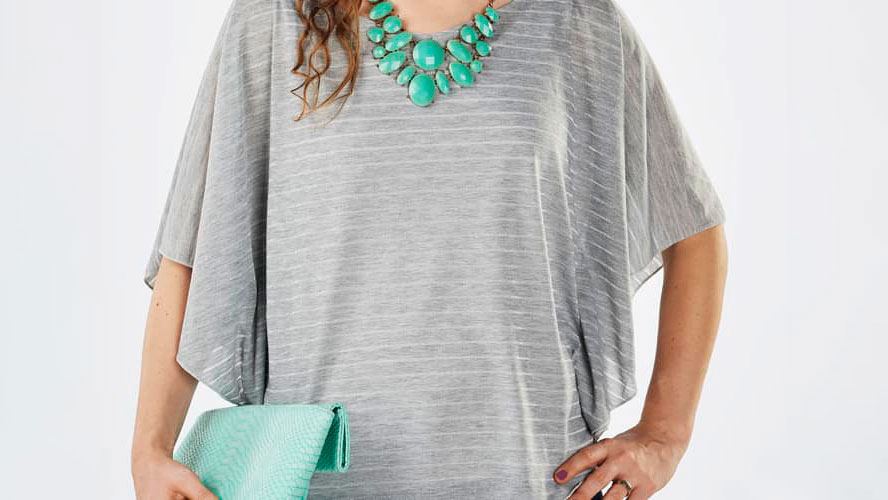
Who doesn't love a cute top you can throw on and run out the door? With your Baby Lock serger this shirt will come together in a snap! It's casual enough to run errands but can be dressed up for a date. You'll love the versatility and how simple it is to make! Download printable instructions.
Materials:
- 3 Spools Madeira® Aerolock serger thread to match fabrics
- Madeira® Aerofil all-purpose sewing thread to match fabrics
- 60” Wide lightweight knit (see step 1 for how much yardage)
- T-shirt (to take measurements from)
Tools:
Steps:
-
To find out how much fabric you need stretch your arms straight out to the side (to form the letter “T”) and have someone measure you from elbow to elbow.
-
hat will be the width of the shirt and the amount of fabric you’ll need if you are cutting the shirt width parallel with the lengthwise grain of the fabric.
-
However if you are cutting with the width because of a directional fabric you’ll need about 60” of fabric.
-
-
Fold your fabric widthwise (selvage to selvage). Then fold it again lengthwise (raw edge to raw edge). Your fabric should be folded into fourths at this point.
-
Take that elbow-to-elbow length + 1” and divide that number by 2.
-
Take that measurement and measure from the center fold out to that measurement and draw a line at a 90 degree angle from the shoulder seam.
-
-
For the neckline measure the width of the neck opening on a store-bought T-shirt.
-
Take half of that measurement and draw a little fourth circle from the center out (this just gives you something to start with).
-
Shape your neckline as desired. Start small; you can always cut larger.
-
-
Then measure on your body from your neckline to where you’d want the hem to lay.
-
Draw a line on your fabric 90 degrees from the center front/back fold where you want the hem.
-
Mark it longer than you measured; you can always shorten. Then connect the 2 lines with a curve.
-
You have to estimate where you stop and start your curve but you can alter it in the next step.
-
-
Cut out the neckline and hemline. Gently try on your top (try not to stretch out the neck).
-
Decide if you need to taper or shape it. You can pin where your side seams would be to get a better idea of the drape.
-
You can also alter the neckline. I ended up changing the front neckline to a V-shape. Just open the blouse and cut on the fold only on the front side of the neckline.
-
-
Once you have your shape figured out thread your serger and set it for a 3-thread narrow rolled hem with a .75 stitch length and a pretty narrow width.
-
Serge around the entire outer oval to finish this edge. If this is new for you practice on some extra fabric to get comfortable!
-
-
Then set your serger to a 3-thread overlock narrow stitch (but set the width as wide as it will go) and carefully serge your neckline.
-
Open up any tight curves or points as you’re serging to catch all edges.
-
Press and/or pin the serged edge under to the inside of the shirt and topstitch down with a smaller knit needle in your sewing machine.
-
-
Lastly try it on again and pin where you want your side seams to be and how high.
-
Mark that line baste a stitch line and adjust the length and location of your side seams as needed.
-
When you find the exact location of the seam you want stitch it down with a 2.5 stitch length.
-


