Learn how to sew with twin needles by creating this stylish clutch! Featuring the look of embroidery while only using decorative stitches this wallet has all the space you’ll need for your cards and photos. Best of all you can create it with your new Baby Lock Jubilant! Download printable instructions.
Materials:
- Diva Frame Wallet pattern from www.sewmanycreationsny.com
- Refer to the pattern for fabric and supply list
- Baby Lock Cut-Away Ultra Soft Stabilizer
- 2 different colored Madeira® Matt threads for decorative stitches
- Twin needle 3.0
- Madeira Cotona thread for sewing
- Frixion marking pen
- One Spool Thread Stand
- Basic sewing supplies
Tools:
Steps:
-
To create the decorative stitched fabric for the wallet follow the next set of directions:
-
Read the pattern (Diva Frame Wallet Pattern) completely before you begin to sew this project.
-
Purchase all of the supplies as listed on the pattern along with the hardware.
-
Cut out a section for the body of the wallet 12” square.
-
Follow Step 1 from the pattern by fusing the Baby Lock Cut-Away Ultra Soft Stabilizer to the sections. Set aside.
-
-
Set up the machine for sewing:
-
Switch to twin needle sewing. (See instruction manual)
-
Wind a bobbin.
-
Thread both of the twin needles by hand: one with light blue thread and the other with navy blue thread.
-
Thread the machine using the same thread path as with the first thread but when you get to the needle area thread the second needle.
-
Place both threads under the presser foot and behind the needles.
-
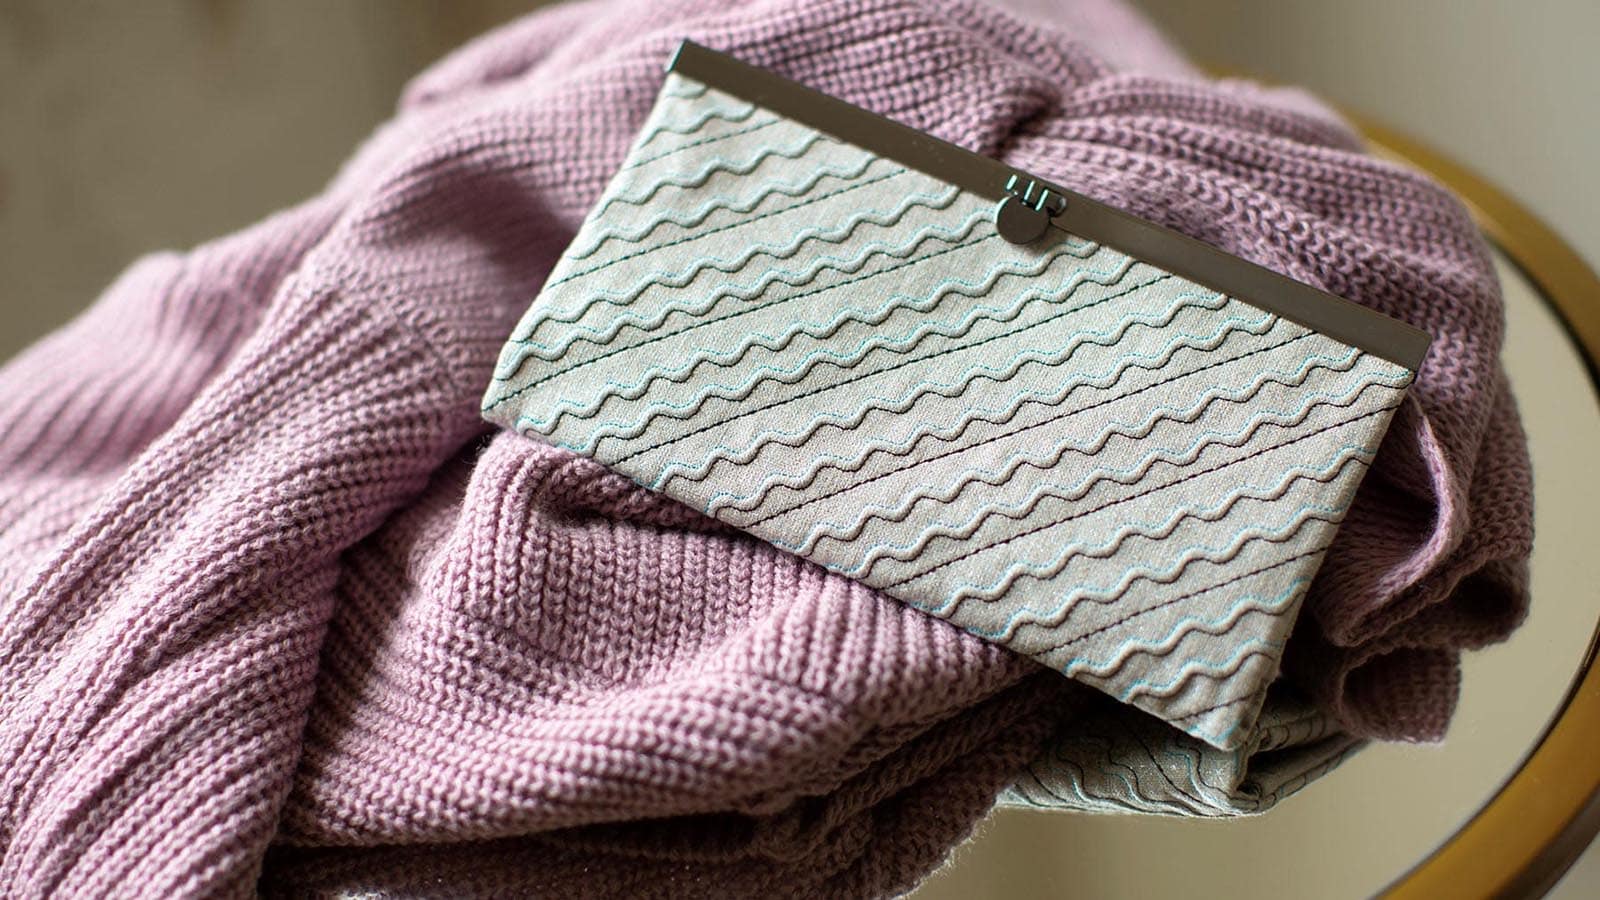
The first decorative stitch to be used will be the serpentine stitch. Select this stitch. Use the default stitch length and width.
-
Go ahead and stitch on the final fabrics. Have fun with this.
-
-
Lay one of the 12” square interfaced body sections on a flat surface. Using a marking tool (Frixion pens) draw a diagonal straight line from corner to corner.
-
Measure ½” away from the first line and draw additional lines until you have place lines across the entire section. Repeat for the opposite side of the section.
-
-
Place the interfaced section under the needle so that the first stitch catches the fabric.
-
Place the edge of the foot along the drawn line and slowly stitch along the line until you get to the opposite corner.
-
Stitch one more row using the serpentine stitch.
-
Skip the third row; jump over to the fourth and fifth row and stitch again with the serpentine stitch. Continue in this manner until the serpentine stitch has been applied
-
-
To switch to the next decorative stitch that will be applied to the remaining unstitched drawn lines follow the next set of steps:
-
Change the machine back to single needle stitching.
-
Remove the twin needle.
-
Attach the single needle to the needle bar.
-
Select the Triple stitch.
-
Set the length to 3.5.
-
Rethread the needle with the navy blue thread.
-
Test-sew to verify the accuracy of the stitch. Make any adjustments at this time.
-
Place the 12” square under the needle so that the first drawn line is centered under the needle. Start with the closest drawn line to the center and work outward.
-
Stitch over the drawn line. Repeat for the remaining unstitched drawn lines.
-
-
Cut the decorative stitched body section to 8 ½” x 9”.
-
Follow the directions (Step 2) from the pattern guide sheet to complete the wallet.


