
Design your own fabric and show off your personal style with this embroidered lunch bag. Download instructions here.
Materials:
- ½ Yard of solid yellow fabric
- ½ Yard of yellow print cotton fabric for lining
- 1 1/3 Yard of 1” wide nylon webbing for handles
- Vinyl Fuse
- 1 snap fastener
- Baby Lock Ultra Soft Fusible Fleece Stabilizer
- Madeira® Frosted Matt (5) colors and Cotona thread for sewing seams
Tools:
- Baby Lock® sewing and embroidery machine
- Frixion marking pen
- Sewing clips
- Basic sewing supplies
Steps:
-
Set up the machine for sewing.
-
From the lining fabric cut two rectangles 13” x 11 ½”.
-
On the right side on each of the two lining sections follow the manufacturer’s directions for fusing the vinyl to the lining fabric.
To hold the layers together stitch rows of straight stitches following the lines on the fabric. Set aside.
-
Cut two sections from the solid yellow print fabric 14” square. These sections will be cut down to size later.
-
Fuse the Baby Lock Ultra Soft Fusible Fleece Stabilizer to the back side of each of the sections.
-
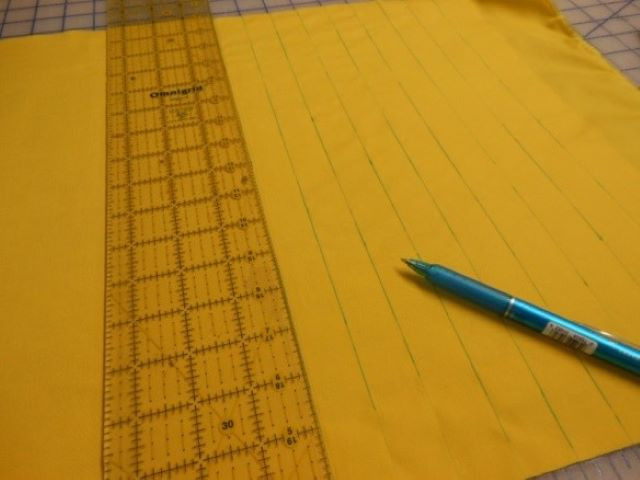
On the front side of each of the fused yellow sections draw several lines across the width of each of the sections one inch apart from each other.
These will be the guide lines on which the decorative stitches will be placed.
-
Set up the machine for Decorative Sewing
-
Wind two bobbins for each of the thread colors.
-
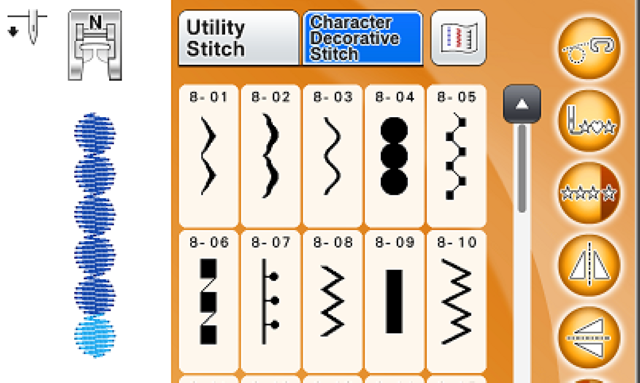
The decorative stitches that were used are trying to replicate the print fabric.
In the sample two different decorative stitches were used. To combine decorative stitches select the first decorative stitch (8-04) (This project was created on the Destiny 2 on the Altair this stitch is 8-04 on the Aerial this stitch is 8-62)
-
Select the Single Pattern button to place only one decorative stitch on the workspace
-
Tap on the decorative Stitch 8-04 six times to place 6 stitch patterns on the workspace
-
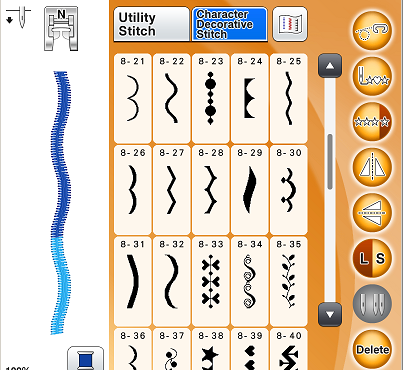
To select the second pattern scroll down and select pattern number 8-25.
Click on this pattern 4 times to place four of these patterns in the row. (This project was created on the Destiny 2 on the Altair this stitch is 8-24 on the Aerial this stitch is 8-23)
-
-
Set the Tension at 1.8.
-
Do a test-sew to verify the accuracy of the stitches.
If the stitches are good do nothing. But if the bobbin thread stitches are pulling to the top adjust the tension to a lower tension setting.
-
Line up the presser foot so that the center of the foot is centered over the drawn line. Stitch across the width of the section.
Repeat for the other section. For each of the lines rethread the machine with a different thread color. Use the same set of patterned stitches for each of the rows.

-
Trim the two decorative stitch sections to 13” square.
-
Place the two section right sides together and pin in place.
-
Set up the machine for straight stitch sewing.
-
Using a ½” seam allowance sew the sides and the bottom edges together. Do not sew the top edge of the bag.
-
Open the seams and press the seams open.
-
Take the two lining sections and place right sides together.
Sew the lining sections together using a ½” seam allowance. Stitch the sides and the bottom edges.
-
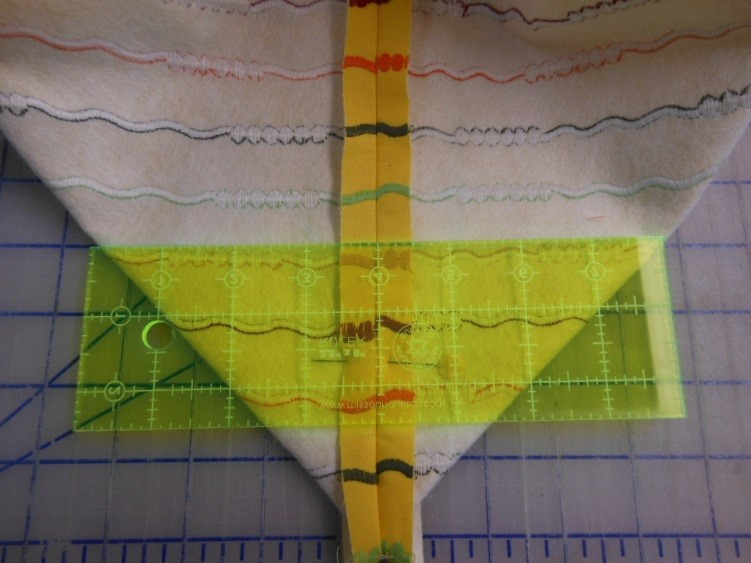
To create the boxed corners on the outer bag and the lining align the bottom seam with the side seam.
Measure 4” up from the corner and mark with the Frixion pen. Stitch across the lines. Use the sewing clips to hold in place. For extra reinforcement stitch twice. Trim close to the seam
-
Turn the outer bag section right side out.
-
Since the top edge will be folded over to the inside the raw edge will show.
So to finish off this edge select a decorative stitch re: 6-14; stitch around the top open edge.
-
Place the lining inside the outer bag with wrong sides facing.
Force the lining into the bag so that the bottom lines up with the outer bag. Use clips to hold the two sections together at the bottom side seam while you are adjusting the positioning of the lining. I left them on until the top edge was stitched.
-
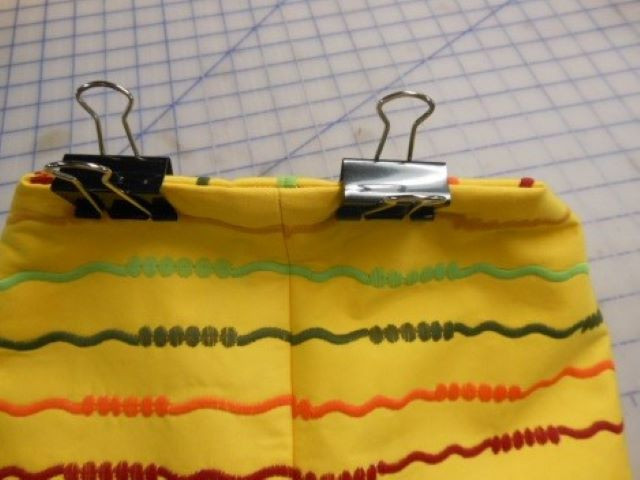
Fold down the top outer edge 1½” over the vinyl lining.
Clip along the top edge to hold in place. Set aside while you work on the handles.
-
Cut two sections from the nylon webbing 20” long.
-
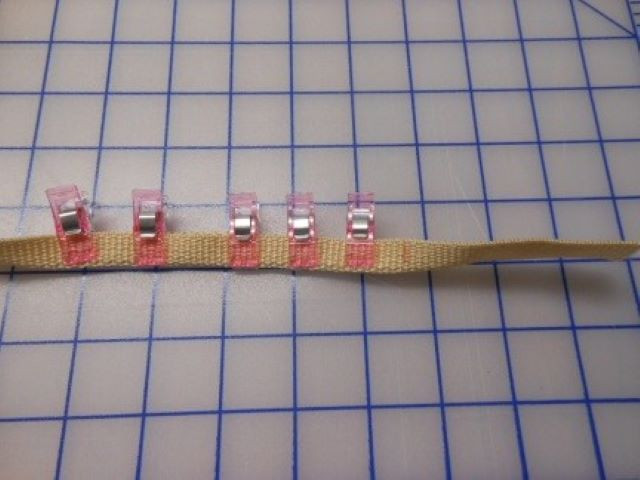
Place a mark 3” in from each end on both ends on each of the webbing sections.
Using sewing clips fold the long edges in half between the marks on each end of the sections
-
Using a straight stitch stitch along the unfolded edge on both of the handle sections.
-
To place the handles on the bag measure 3” in from each of the side seams and place a mark.
- Repeat for the back of the bag. Slip the flat ends of the handles inside the top edge facing at the 3” mark and fold the handles up towards the top edge. Secure with clips. Make sure that both handles are placed with the same orientation.
-
Top stitch 1” down from the edge and then ¼” from the top edge.
-
Attach a snap on the center top opening ½” down from the top edge.


