

March 14th may be Pi Day but you can celebrate pie any day with this fun and festive pie potholder! With this free foundation paper piecing pattern you can make this to for yourself or as a housewarming gift for a friend.
Download the Project Instructions here.
Download the Berry Pie Paper Piecing Pattern here.
Check out these 11 Quilting Tips for Flawless Foundation Paper Piecing here.
Project created by Baby Lock Ambassador Lindsay Conner of Lindsay Sews.
Materials:
- Berry Pie Paper Piecing Pattern
- 1/8 yard each of three fabrics (yellow blue tan) for the quilt block
- 9” square of backing fabric
- 9” square of cotton batting
- 9” square of Insul-Bright (heat-resistant) batting
- 2 1/4”x 42” strip of fabric for binding
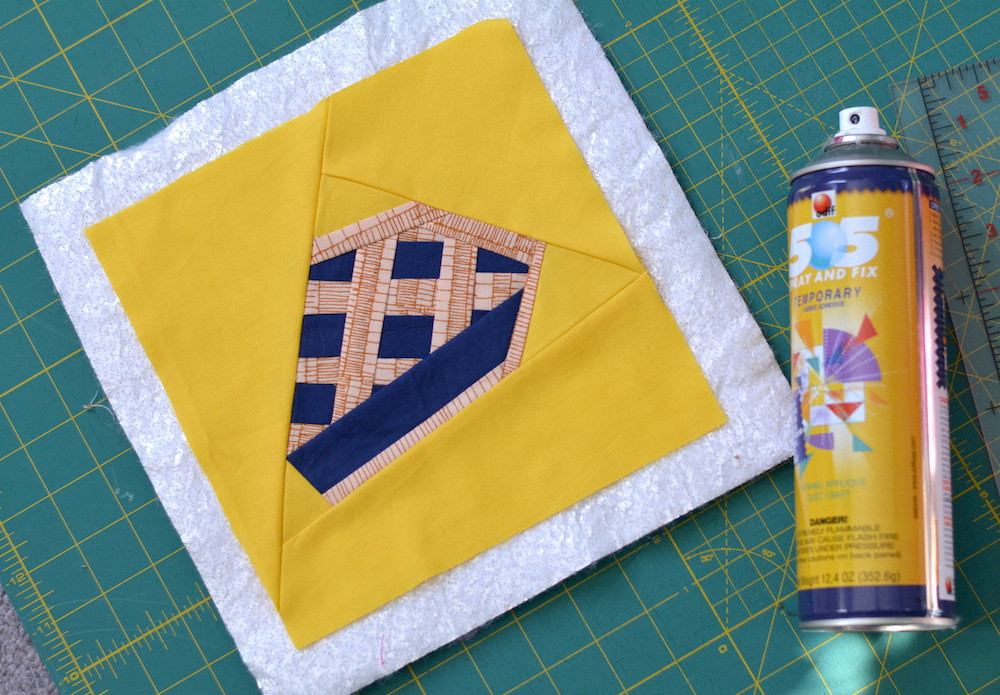
- Basting spray or pins
- Basic sewing supplies
Tools:
Steps:
-
Make the Berry Pie Block
-
Print the PDF pattern at 100% scale.
-
Use our 11 Quilting Tips for Flawless Foundation Paper Piecing to complete the block assembling each section one at a time (A through J).
-
Add completed section A to sections B and C. Add D (top crust) and the completed sections E F and G to complete the crust.
-
Add the background pieces H I and J to complete the block.
-
Remove the paper from the block and press.
-
-
Quilt the Pot Holder
-
Stack the backing fabric right side down. On top place the insulated batting and regular batting squares. On the very top place the pie quilt block.
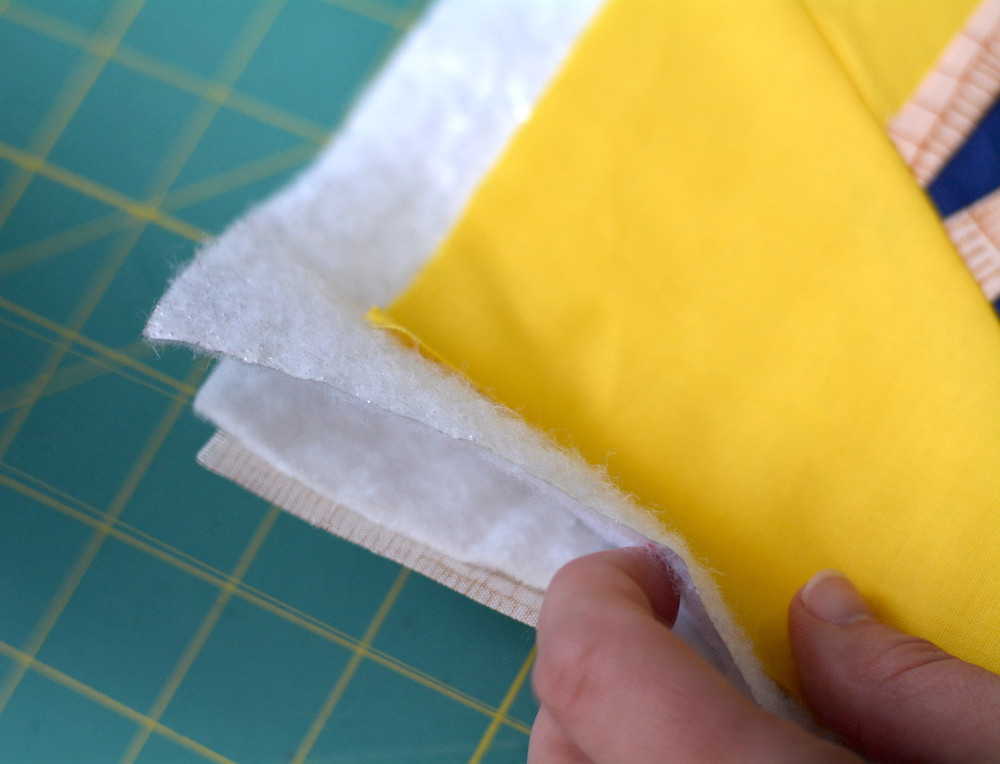
-
Use basting spray or pins to keep the layers in place.
-
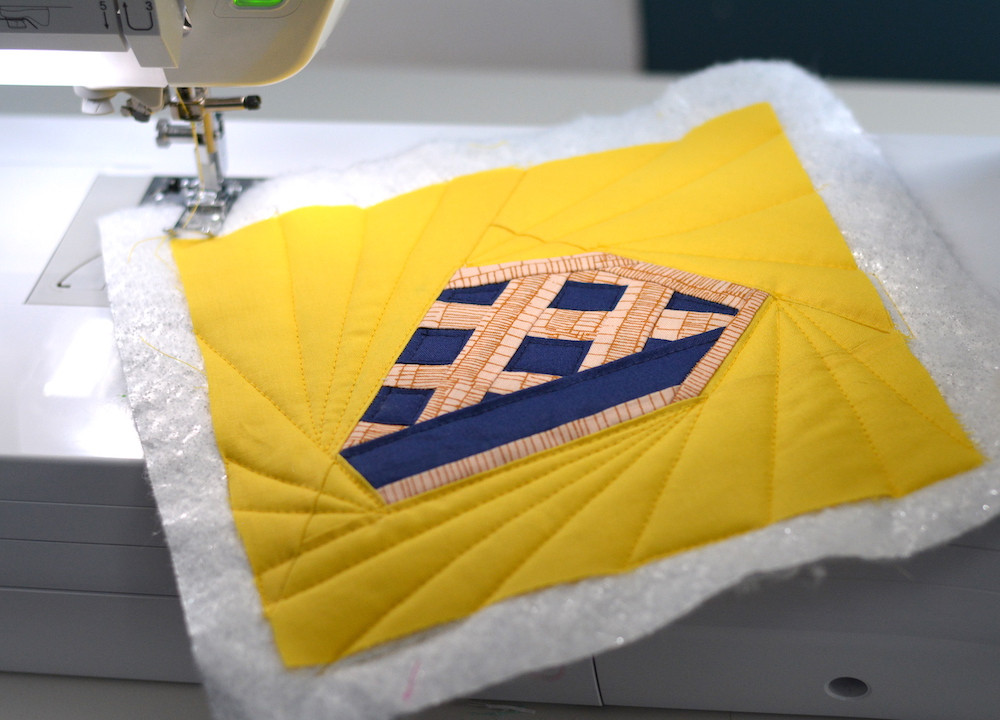
Quilt through all the layers with straight lines (tip: use a walking foot) or free-motion quilting.
-
-
Finishing
-
Trim the pot holder so the edges are even. Baste around the edges 1/8” from each side.
-
Add binding to the edges just like you would with a quilt. Use our binding basics video to learn how to do this!
-
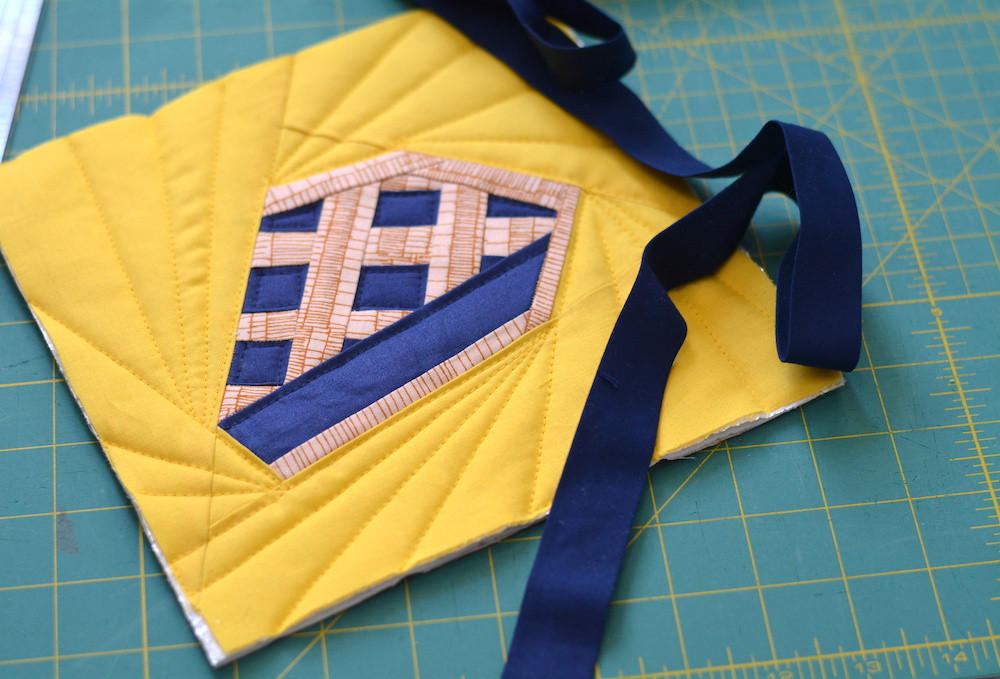
If you’d like to add a hanging loop start the binding at the upper left corner.
-
Continue around the pot holder until you reach the same corner. Encase the original edge of binding in the new binding and clip in place
-
Leave about 7” of additional binding off the corner. Fold the raw edges of this loose binding in to the center and topstitch in place.
-
Loop the end of the extra fabric around to the back of the potholder and zig zag stitch in place to the corner to make the hanging loop.
-


