Customize a baseball cap by adding embroidery to the center back with a Baby Lock embroidery machine. Use a 50mm x 50mm hoop for this project and a stencil-style built-in font. Embroider one for yourself and then create several for each of your teammates to be a real MVP! Download printable instructions.
Materials:
- Purchased baseball cap
- Baby Lock Cut-Away Soft stabilizer
- Marking pen
- Madeira embroidery thread
- Basic embroidery supplies
Tools:
- Baby Lock Embroidery Machine with 50mm x 50mm hoop
Steps:
-
Turn the machine on.
-
Place a full bobbin in the bobbin case.
-
Thread the machine with Madeira embroidery thread.
-
Place the "e" bracket on the machine.
-
Cut a 4" square piece of stabilizer.
-
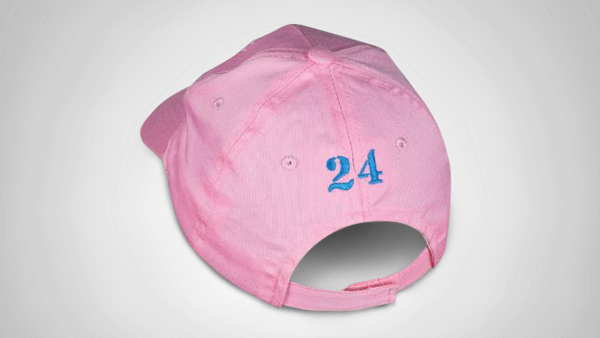
Mark the center placement line on the cap back for placement of the embroidered numbers.
-
Using the 50mm x 50mm hoop place the stabilizer over the bottom section of the hoop and place the cap with the placement mark centered in the hoop.
-
Place the inside section of the hoop over the cap area and press in place.
-
Remove any wrinkles on the cap by pulling the fabric taut.
-
Tighten the screw on the hoop so that the cap does not shift. Place the hoop on the machine.
-
-
To place the letters on the workspace select the second font icon.
-
Select the 11th font shown below in the following illustration.
-
Select Number field. Select the number 2 on the screen. Under the Sizing field select the (M) for medium sized letters.
-
Select the next number (4) to place it on the workspace. Click on Set.
-
-
Center the numbers over the center mark on the cap by using the arrow keys on the screen to move the letters and using the needle beam as your guide
-
Once the letters are placed correctly click on the Embroidery icon. Embroider the design.
-
Remove the cap from the hoop. Cut the stabilizer away from the back of the cap close to the stitching.
-
Enjoy!


