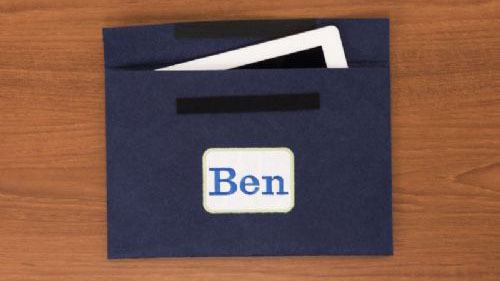
Create a tablet case using a 12” x 18” piece of reinforced felt with the Baby Lock Aventura II built-in frames and font. They're so easy and fun to make that you won't be able to stop with just one! Create one in every color and for every person in your life. Download printable instructions.
Materials:
- Baby Lock Stick-Tear Tear-Away Stabilizer (BLT102)
- 1 stiffened felt piece 12” x 18” purchased from a hobby and craft store
- Madeira® Cotona sewing and rayon embroidery thread
- Bobbin thread
- Chalko marking tool
- Hook and Loop tape (Adhesive backed)
Tools:
Steps:
-
On a flat surface place the 12” x 18” felt section.
-
Fold the bottom section upward so that the tablet fits inside while allowing enough space for the top to fold over the tablet to create a flap to enclose the tablet.
-
Finger press over the fold lines.
-
-
Determine the center point where the design will be embroidered and mark with a cross-mark.
-
Hoop the Baby Lock Stick-Tear Tear-Away Stabilizer with the shiny side up.
-
Score any area in the hoop with a pin and peel the paper away to expose the sticky side of the stabilizer.
-
-
Place the felt section with the cross-marks in the center of the hoop and finger press to secure. Set aside.
-
Add the name of the person to whom the tablet will belong. Use uppercase lettering for the first initial and lower case for the remaining letters in the name.
-
-
At the embroidery machine turn on the machine and set up for embroidery. Follow the next set of steps to create the embroidery:
-
Click on the Frames icon.
-
Select the rectangle frame.
-
Select the Single Run stitch.
-
Duplicate the area.
-
Select the Satin stitch rectangle outline shape.
-
Click on Add.
-
Select the Fonts folder.
-
Select a font from the list.
-
Add the name of the person to whom the tablet will belong. Use uppercase lettering for the first initial and lower case for the remaining letters in the name.
-
-
Resize the frame if needed so that the name fits inside.
-
Set up the machine for embroidery:
-
Wind the bobbin with white bobbin thread.
-
Place the bobbin in the bobbin case.
-
Using the first color in the design thread the machine.
-
Place the hoop on the machine.
-
Embroider the first color. This will be the placement line.
-
Place the appliqué fabric over the placement line.
-
Embroider the next thread color.
-
When the machine stops remove the hoop from the embroidery unit.
-
Trim close to the stitched line to remove any excess fabric outside the line.
-
Place the hoop back on the embroidery unit.
-
Embroider the next thread color. This will be the satin border outline.
-
The last color stop will be the lettering inside the border frame. Re-thread with the color of your choice.
-
Remove the hoop and tear-away the stabilizer from the back of the felt.
-
-
Set up the machine for sewing and follow the next set of steps:
-
Fold the bottom edge upward to create a pocket.
-
Top stitch close to the edge on both sides.
-
Fold the top flap down and finger-press.
-
Attach the Hoop and Loop tape to the center of both the flap and under the flap. Press to secure or if you choose you can sew the hook and loop tape.
-
Insert the tablet.
-


