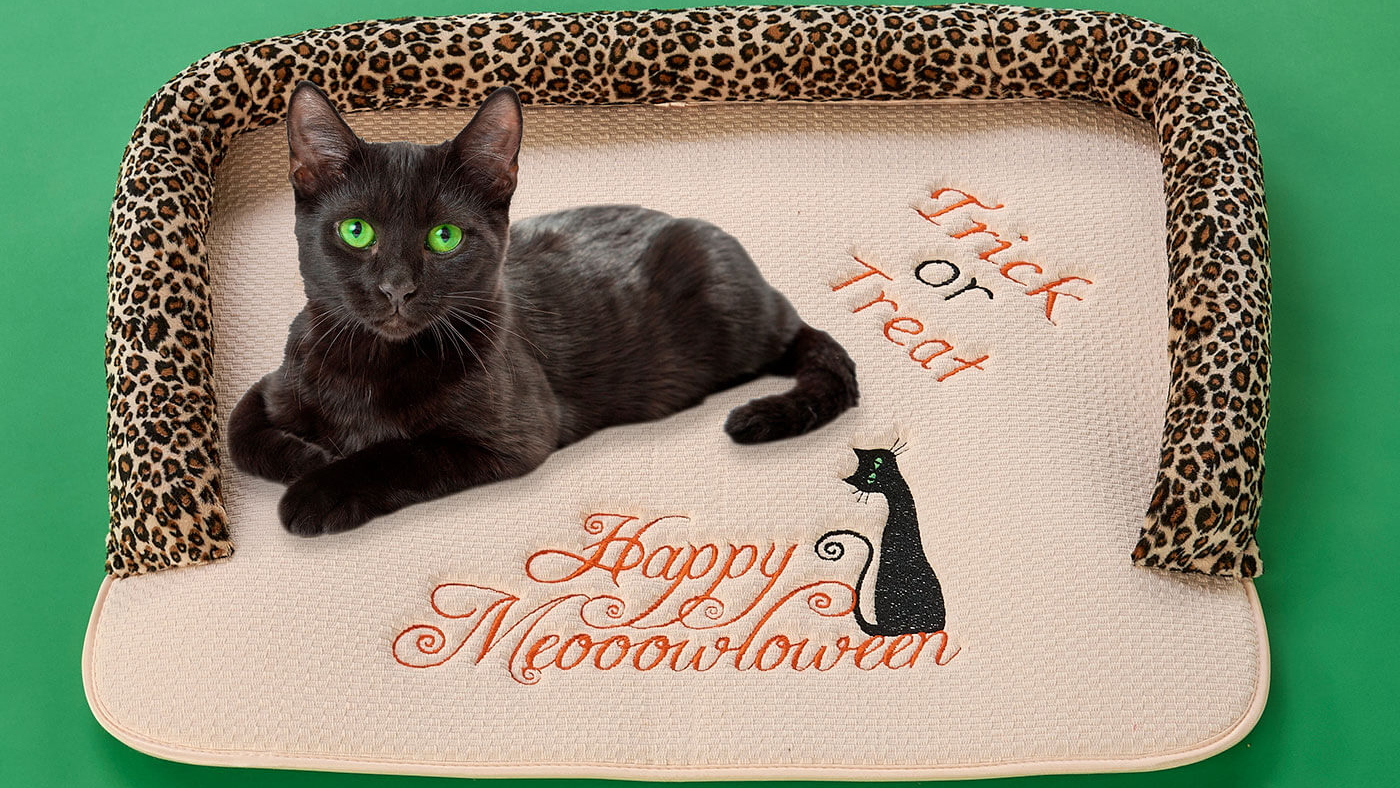
Create a cozy retreat for your pet to sit and relax after an event filled evening of trick-or-treating. Decorate your mat with embroidery using a built-in design and lettering with the use of the Baby Lock Destiny II sewing and embroidery machine. Download printable instructions.
Materials:
- Dish drying mat 24” x 18” (beige)
- Cheetah Cuddle® from Shannon Fabrics (Tan/Brown)
- Madeira® Cotona sewing and embroidery threads (Black and Orange)
- Fiber fill
- Fasturn set
- Positioning Sticker
- Basic sewing supplies
Tools:
- Baby Lock® Destiny II Sewing and Embroidery Machine
Steps:
-
At the cutting mat cut a strip of the Cheetah Cuddle fabric 6 ½” x 50”.
-
With the machine set up for sewing. With right sides together sew a ½” seam along the long edge of the fabric to create a tube. Turn the section right side out with a Fasturn set.
-
Stuff the cheetah tube with the fiber fill.
-
Whip stitch the ends closed. Set aside.
-
Hoop the Baby Lock Stick-Tear Away stabilizer in the largest hoop. Be sure that the shiny side is facing up.
-
Remove the top layer of the paper on the stabilizer by scoring the edge along the inside of the hoop.
-
-
Place a Positioning Sticker on the dish drying mat 4” up from the bottom edge centered from left to right.
-
Float the dish drying mat over the hoop with the cross-marks on the sticker centered in the hoop. Finger press to secure.
-
Set up the machine for embroidery and follow the next set of steps:
-
Click on Embroidery.
-
Click on under Exclusive select Celebrate.
-
Scroll down and select the Cat image as shown in the following illustration.
-
Set the design.
-
Place the hoop on the embroidery unit.
-
Rotate the design as needed so that the design will point downward on the mat.
-
Click on Edit.
-
Select the Positioning Sticker icon. The machine will scan the area inside the hooped frame based on the sticker that is on the dish drying mat.
-
Embroider the design using the Madeira threads.
-
-
To embroider the “Trick or Treat” phrase follow the next set of steps:
-
Click on Home to get a new screen.
-
Click on Embroidery.
-
Click on Fonts.
-
Select the 5th font or if you prefer you can choose any of the fonts.
-
Use uppercase for the first letter. Type in the first letter “T”
-
Select the lowercase option. Type in the remaining letters in the word “Trick”
-
To bounce to the next line click on the Arrow
-
Type in “or” using lowercase lettering.
-
Click on the Arrow icon to bounce to the third line.
-
Using uppercase lettering again for the first letter of “Treat” and lowercase for the remaining letters.
-
Click on Set.
-
Re-hoop using the same stabilizer and hoop. Remove the top layer of the stabilizer.
-
Determine the placement for the lettering.
-
Place a Positioning Sticker 7” diagonally down from each corner.
-
Place the mat centered in the hoop so that cross-marks on the sticker are aligned with the markings on the hoop.
-
Embroider the lettering using the Madeira embroidery thread.
-
-
Remove the stabilizer from the backside of the mat.
-
Sew the cheetah tube to the sides and back of the mat as shown in the illustration using a hand needle.


